Here’s the brutal truth about DIY pedalboard:
There are LOTS OF ARTICLES out there called “step-by-step” guide that helping you to build your own homemade pedalboard and you may think they’re all great enough.
Those articles say, “…everything you need to know”, “…and all of them are affordable!” .
If only it were that easy…
If you’re serious about making your own board, you need to be very systematic with how you do in each step.
Otherwise you’re going to be bankrupt soon or have a lame one, it’s like throwing everything against a wall to see if it sticks. Or in seriously careless way: losing your finger!
Well, instead of putting an ultimate guide on the table as always (because I’m not great enough as a bunch of articles), I have conducted an interview with 12 expert builders in the market to share their stories about these DIY stuffs, to help you avoiding some mistakes even the professional made. And now, let’s go!
Jeff From Groundswellpedalboards.Com
1) Which aspects do you mostly focus on when coming to the pedalboard design and style?
I’ve really focused on finding a sweet spot between keeping my pedalboards both strong and light. Functionally, I’ve also focused on a design to keep cables neatly hidden under the pedal deck without sacrificing a strong pedal platform.
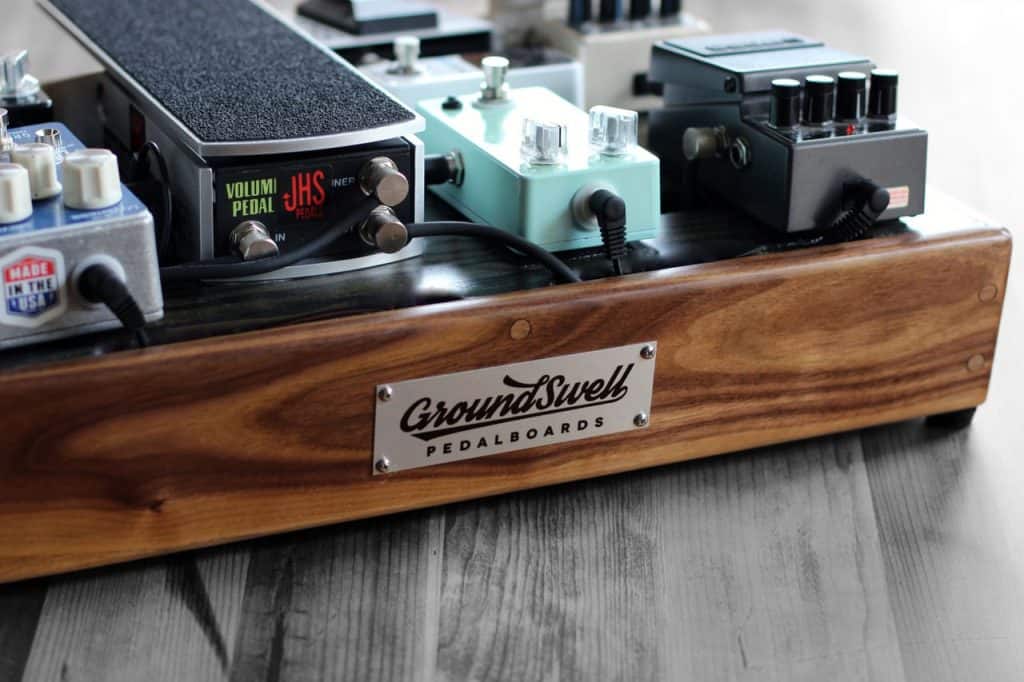
Regarding style, I’m all about the hardwoods. I love how every piece of wood is unique and I enjoy seeing it come to life as I work through the finishing process.
2) As a custom pedalboard builder, you definitely have some cool ideas and special features for your products. Can you share something about them?
Thanks! Here are a few things that I believe make my pedalboards stand out:
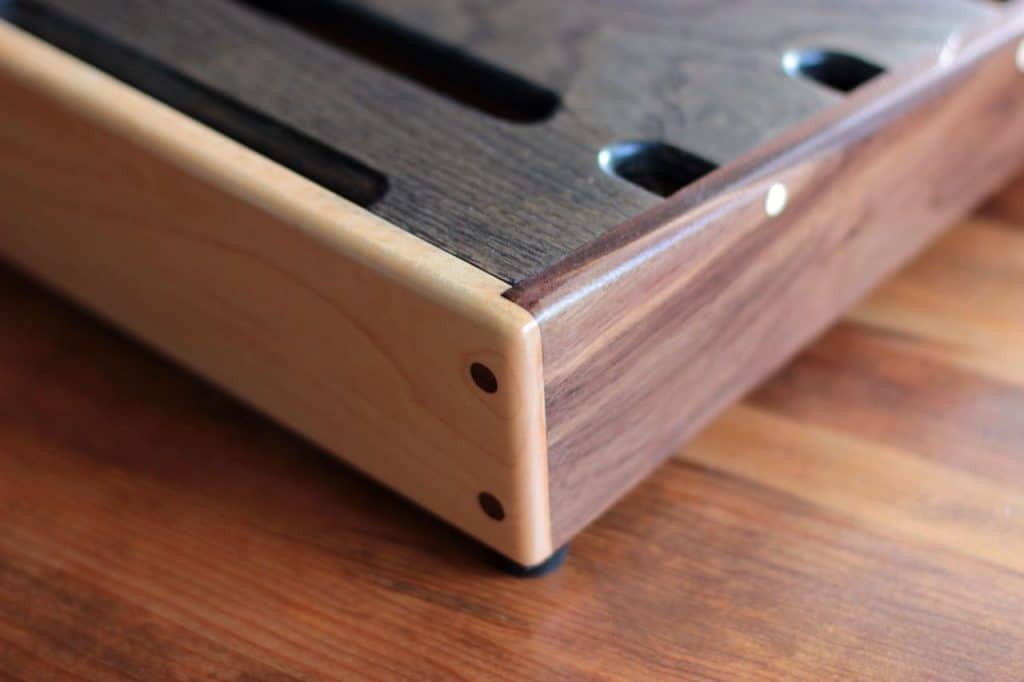
– Joinery: I construct my pedalboards with screw reinforced rabbet joints on every joining corner as well as the pedal deck. It’s time-consuming for me but I’ve found that this extra step has made my pedal deck much stronger and also has eliminated the extra wood and hardware that would otherwise be needed underneath the pedalboard to hold up the deck.
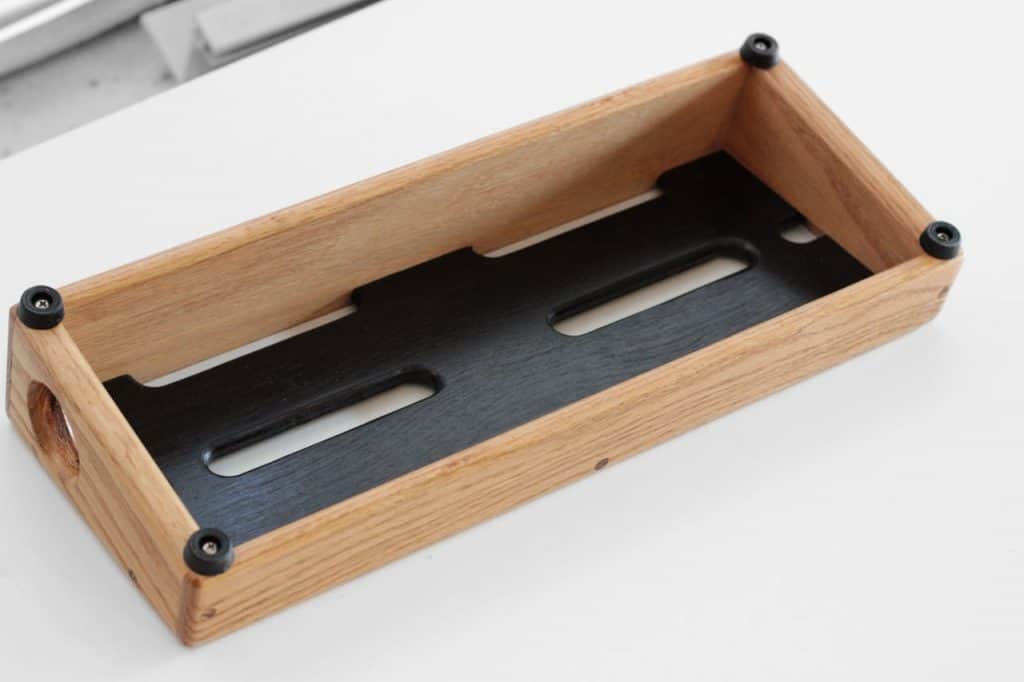
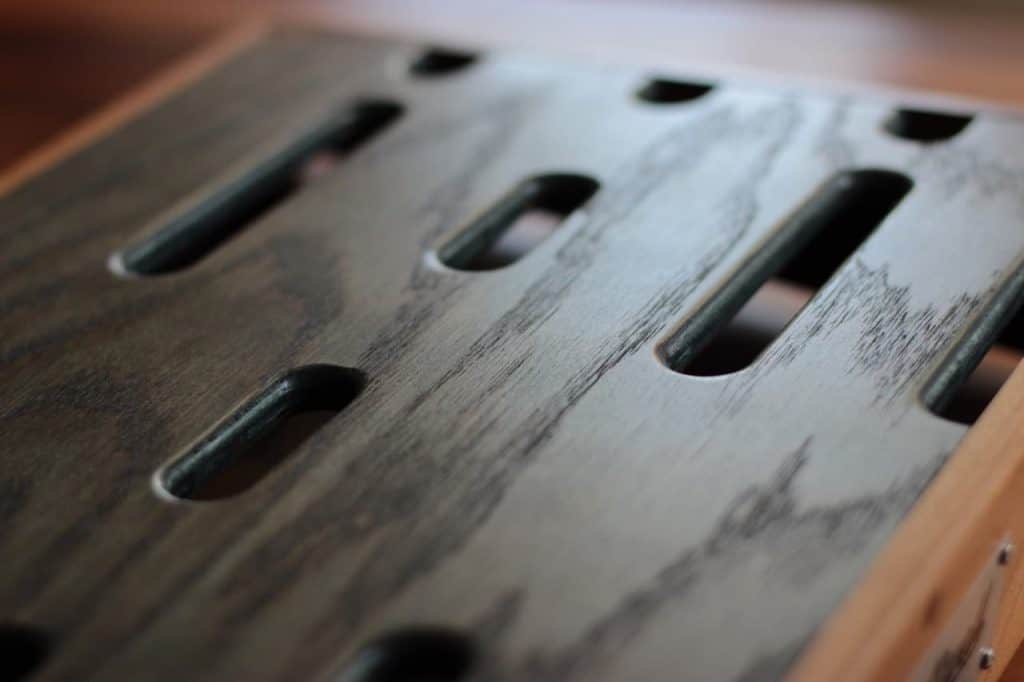
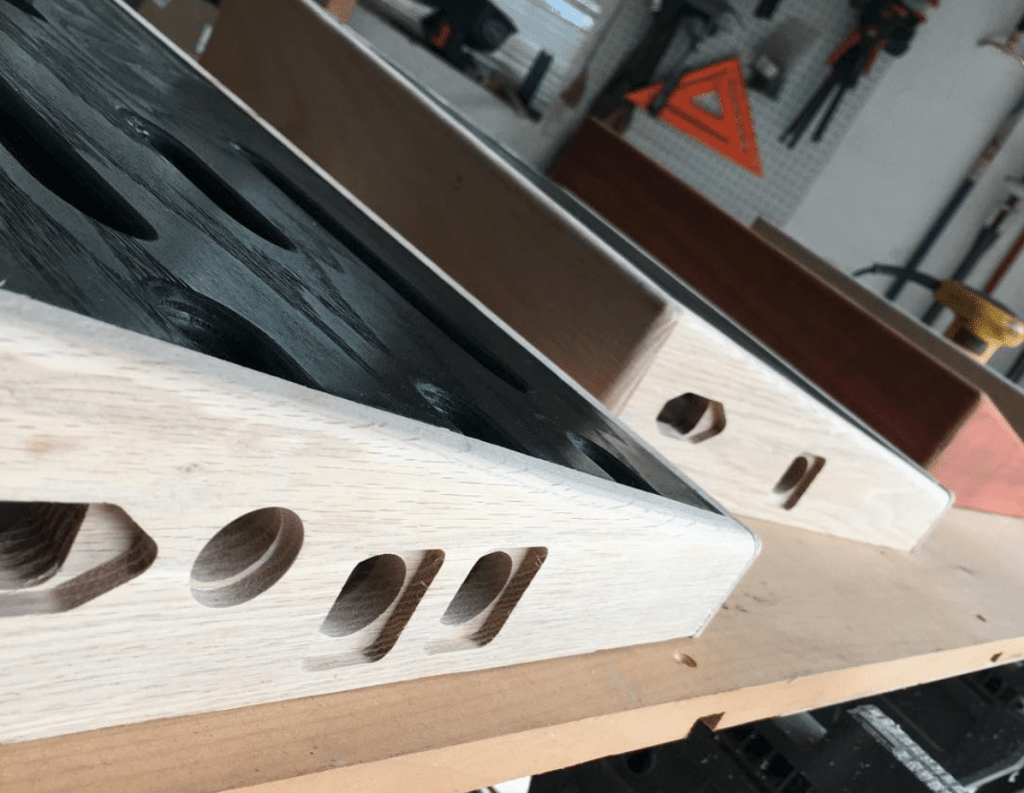
– Cable slots: These are also time consuming to carve out, but every one of my pedalboards include multiple 3/4″ slots cut into the pedal deck to provide convenient cabling access.
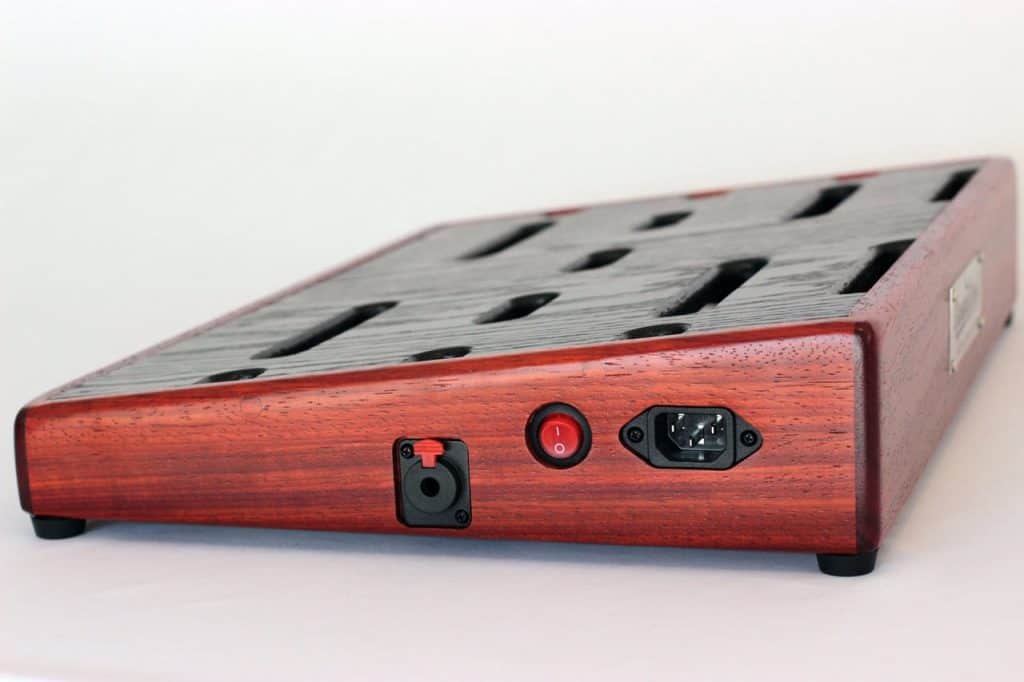
– Recessed power inlets and ¼” jacks: I let my customers choose where I install their power inlets along with their ¼” jacks, etc. I also spend extra time recessing all of those inlets and jacks to make for an even cleaner/professional look. Additionally, I realize that installing power supplies can be somewhat tricky so I allow customers to mail me their power supplies and I can install them for no extra charge.
– Beautiful Hardwoods: I hand select every piece of wood and spend hours sanding and finishing the pedalboard to bring about a very smooth finish. I give customers several types of hardwood to choose for their pedalboard.
3) Which materials do you choose to build your pedalboard (Woods/Cable/Wiring) and Why?
– For the perimeter of the pedalboard I use ½” thick hardwoods. (Walnut is my personal favorite). For the pedal deck I use ½” thick plywood (either birch or oak plywood). I’ve found both of these thicknesses to be very strong while still keeping the overall pedalboard lightweight. With several coats of sealing and finishing the wood is very protected. (I still wouldn’t recommend taking your pedalboard out on a rainy day, just as I wouldn’t recommend taking your pedals out on a rainy day).
– Also, I’m a fan of using screws. I go through several steps to make my own matching screw plug to hide the screws, but for the DIYer simply using screws would do the trick and keep things together.
4) Building Process: At the first time building a pedalboard, we may encounter a lot of difficulties and trouble? Can you give us some advices and your stories?
These tips are very basic, but if you’re attempting a DIY pedalboard I think they’ll prove to be helpful:
– Drill pilot holes before putting in screws. My first time using oak hardwood I cracked the wood by putting in a screw without a pilot hole.
– If you don’t own many tools and want to keep the project cheap, just ask the guys at the wood/hardware store to make cuts for you. Most of the time they are willing to help.
– Always respect your tools! Several years ago I was making a bunch of angled cuts on my table saw and made the bone headed decision to not use a push stick (probably out of laziness and overconfidence). Big mistake. Somehow I nicked the edge of my finger and it was quite a scare! Lots of blood went everywhere and a little chunk of my middle finger was gone. Thank God that it was just the edge of my finger and after several long months it finally grew back. Not everyone has a happy story like me. Lesson learned!

We exist to provide artists with a pedalboard that is just as beautiful as it is functional. With several sizes, styles and customizations to choose from, customers get to design a pedalboard that best serves their unique style and sound. Each of our boards are handcrafted from beautiful hardwoods with great attention to detail. No two are just alike. And like your personal instrument, each pedalboard is a work of art.
Chris From Chemistrydesignwerks.Com
1) Which aspects do you mostly focus on when coming to the pedalboard design and style?
Ease-of-use is always number one, two and three, fourth is clean timeless lines. For the design of the Holeyboards I draw on inspiration from the Bauhaus movement from the early 20th century for clean lines and semantics where the form inspires the function, the Arts and Crafts movement from the late 1800’s through the 1920’s for their belief in truth to materials and construction, meaning that the user should be able to see how it is constructed and that the materials usage is honest and straightforward – meaning, real aluminum, wood, etc. in my designs.
2) As a custom pedalboard builder, you definitely have some cool ideas and special features for your products. Can you share something about them?

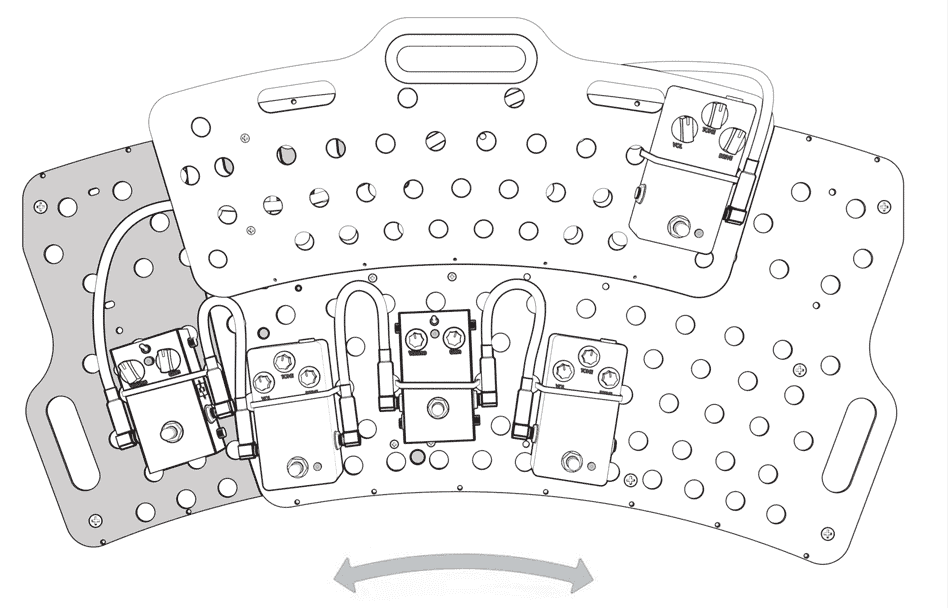
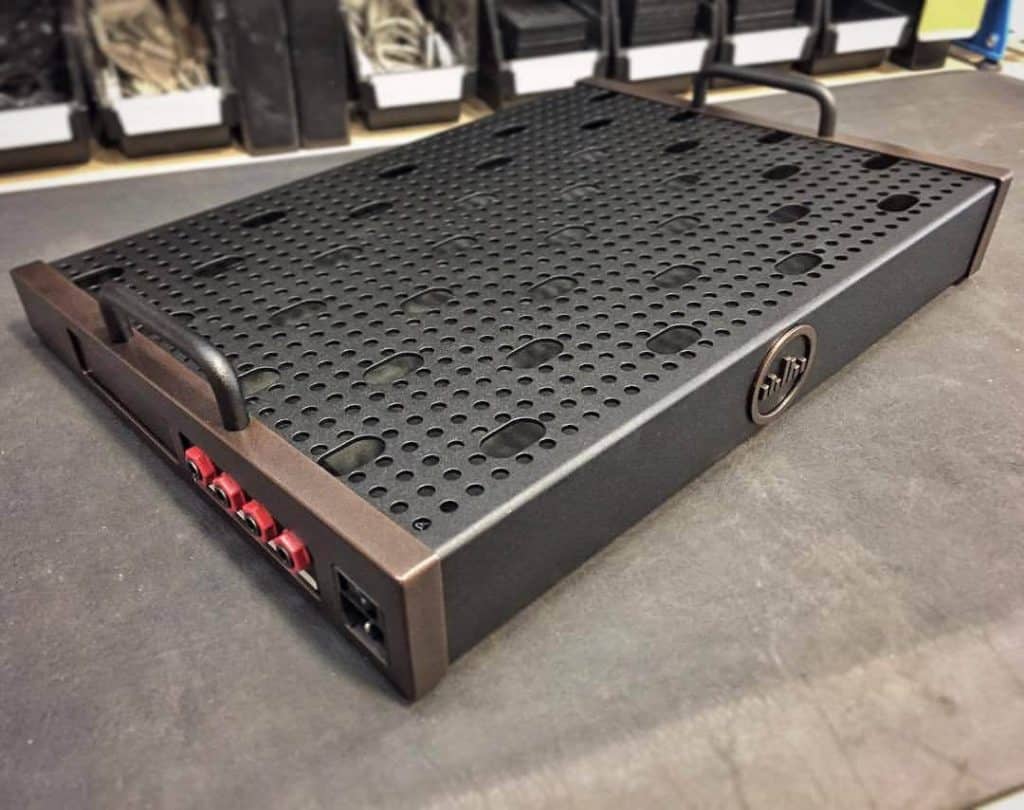
My Holeyboard Pedalboards are actually designed so that the user can make them custom to them, but they all use the same five or so parts, that’s the magic. They all incorporate many holes to accommodate zip ties rather than Velcro, they all have two levels to avoid the need for toe dancing to reach the pedals in the back row and they are all built with a curved deck to follow the arc of your foot as it swings to optimize ergonomics and to make your pedals easier to play.
3) Which materials do you choose to build your pedalboard (Woods/Cable/Wiring) and Why?
I started with Baltic Birch Plywood, then moved to using high pressure laminates with the Baltic Birch, after 6 years I have evolved to All aluminum construction for light weight, great strength, and an light ecological footprint.
4) Building Process: At the first time building a pedalboard, we may encounter a lot of difficulties and trouble? Can you give us some advices and your stories?
First, think about 6 months down the road, you are going to want a few more pedals, and you are going to want to change things out, so start with a pedalboard design and size that will fit your needs in the future.
Also it’s best to start out with a nice power supply, it’s often the last component added as it’s more fun to buy fuzz pedals, but a solid power supply is the backbone of your pedalboard, don’t skimp, it will keep everything dead quiet and allow you to easily mix in and out different pedal configurations with ease.

Chemistry Design Werks is the hardest working company in the pedalboard business. We are obsessed with creating the easiest to use, highest performance pedalboards in the world. We never stop innovating and creating what’s next. Proudly made in the USA with a lifetime warranty.
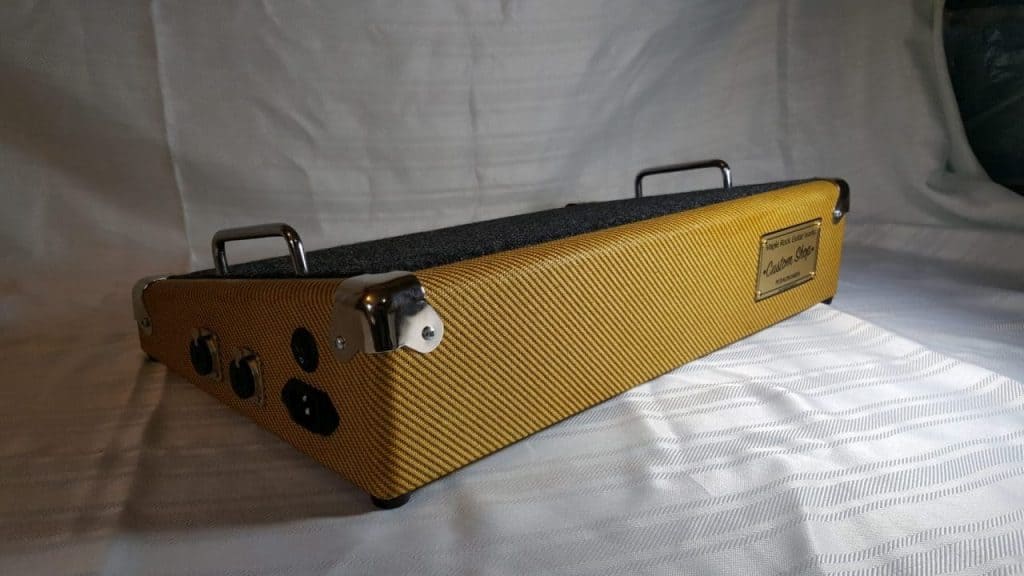
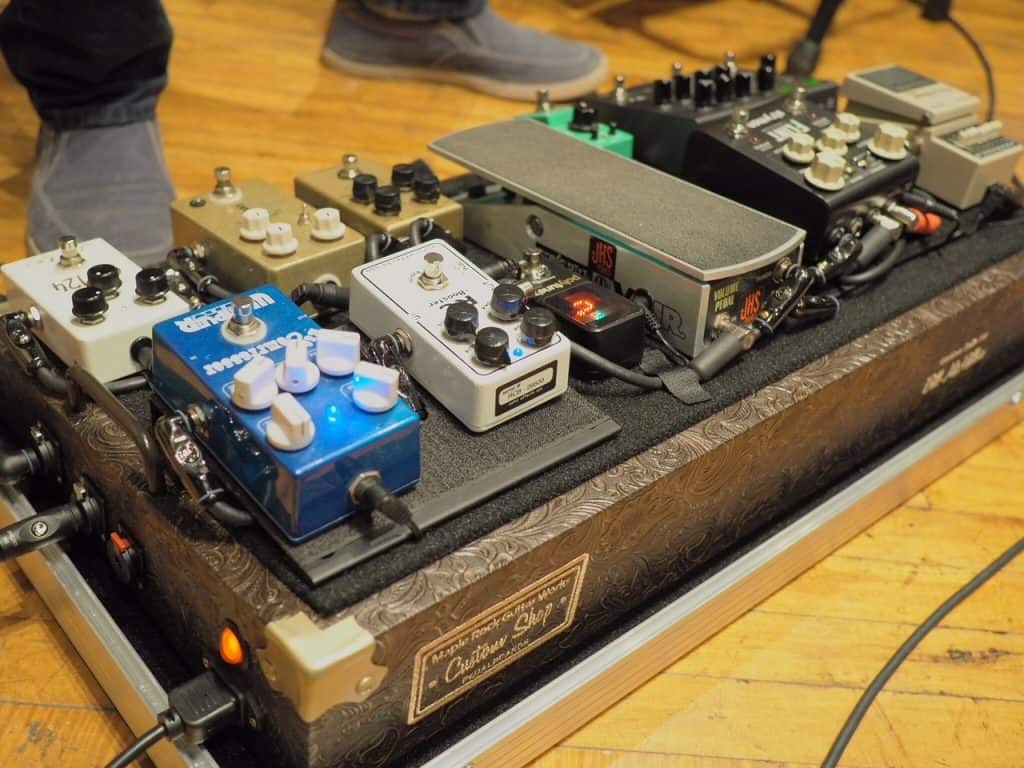
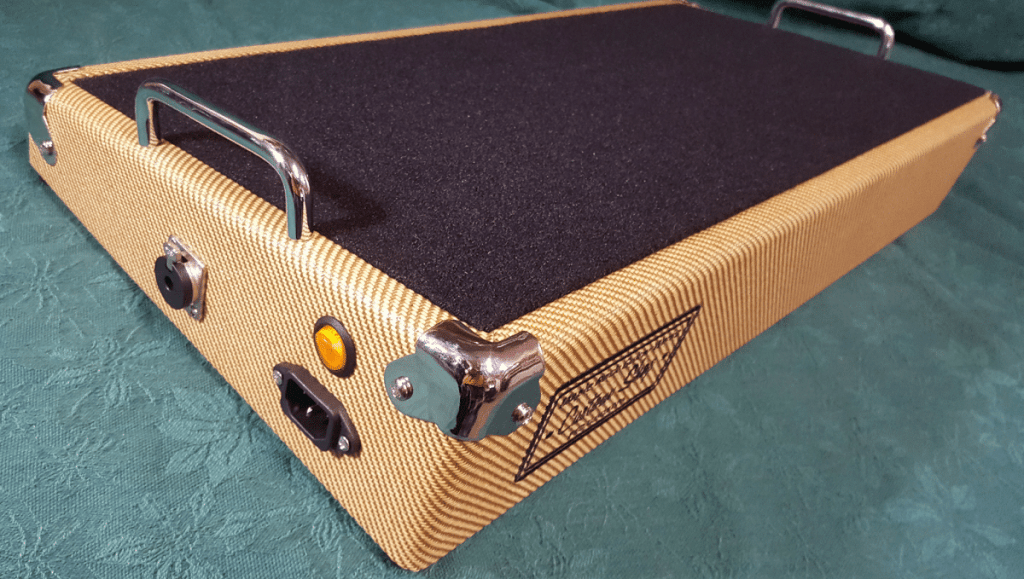
Larry From Maplerockpedalboards.Ca
1) Which aspects do you mostly focus on when coming to the pedalboard design and style?
Functionality first, and always. When planning a pedalboard build, what you need it to do, and where you need it to go, should be the first things on your mind. Do I plan on flying this creature? Am I going to have to carry this thing up several flights of stairs? Keeping your design tight is important for the musician on the go. We put a lot of time and effort in to making a classy and good looking pedalboard, but functionality has to be first.
2) As a custom pedalboard builder, you definitely have some cool ideas and special features for your products. Can you share something about them?
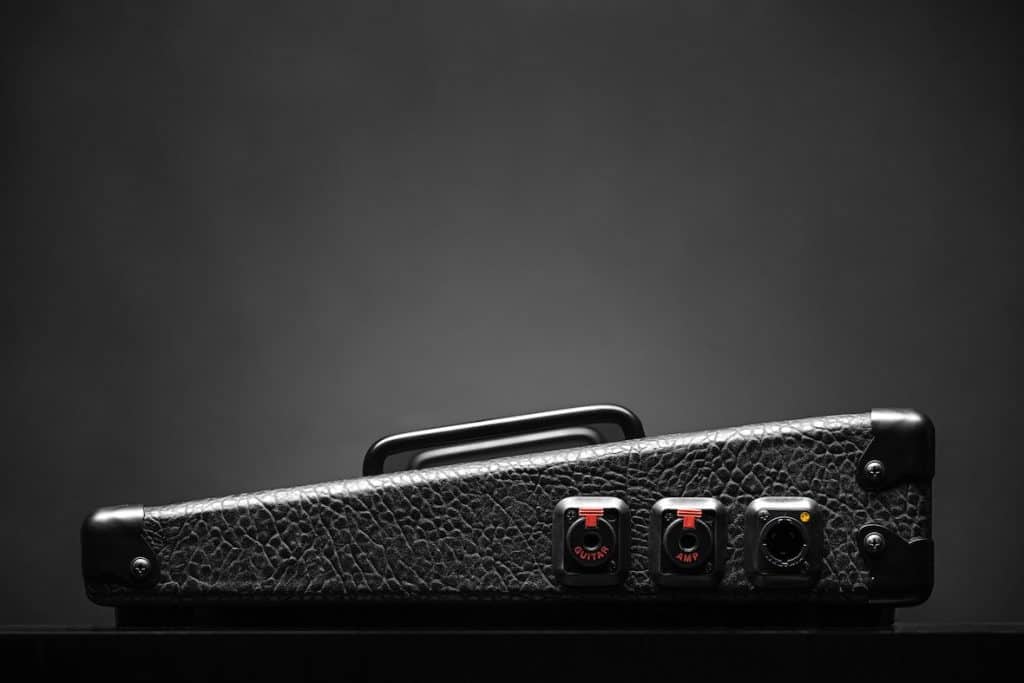
Ease of use and setup. With a “No fails” attitude. Ever play a small stage and have someone yank a cable out of your rig during a set? Grrrrr! That happened to me years ago, on my first DIY pedalboard. That’s why we don’t put any cabling on the front of our boards. Sure, some musicians have the luxury of a huge stage, and a crew to handle all of their gear. But that just isn’t the reality for most of us. For me it’s quick set up/tear down and keep it as simple as possible.
Our Maple Rock ProSeries Pedalboards are mounted into the base of the flight case, they look great, are light weight, and are basically lift the lid off and plug and play. One secret to our success is customer service, and listening to the people that use our product. What’s a few extra minutes of planning to make sure everything is perfect?
3) Which materials do you choose to build your pedalboard (Woods/Cable/Wiring) and Why?
Wood: baltic birch all the way! It is a tad heavier than pine etc… but how useful is your board going to be if it wobbles or moves under your foot? If you skip anything, don’t cheap out on the wood or the rubber feet!
For cabling we use Mogami, Switchfraft, and Neutrik. Although there is an endless number of guitar cable manufacturers, and almost any of these will do fine with shorter runs of a pedalboard, we stick with quality name brand parts.
If carpeting your board top, use quality Velcro or 3M carpet (use quality stuff on your gear too).
4) Building Process: At the first time building a pedalboard, we may encounter a lot of difficulties and trouble? Can you give us some advices and your stories?
Woodworking: Don’t skip out on the sanding and filling. This early step will show on a finished pedalboard whether painting or tolexing. If you are covering your new rig with material, be sure to drill all your holes first.
For DIY tolex/carpet adhesive consider using something like 3M Super 77. It is available at your local hardware store. Be sure to do a few test runs on some scraps first! Tolexing with contact cement is a very touch and feel process.
TIME: This is a big one. Depending on the pedalboard you are building, allow several days for your new creature to take life. Be patient when allowing glues, adhesives, paint etc. to dry.

We pride ourselves in building the best and most durable pedal boards you can imagine. We build custom pedalboards, flight cases, road cases, and pedalboards with lids. We build them for you, and we build them with you in mind every step of the way at our shop. We’re guitar players too, so we understand what your needs are. We are all about value!
Göran From Soundofsilence.Se
1) Which aspects do you mostly focus on when coming to the pedal board design and style?
First we get an overview of the clients rig, playing style and how they travel.
Based on that we design the rig that we think the client really need.
2) As a custom pedalboard builder, you definitely have some cool ideas and special features for your products. Can you share something about them?
We will get the whole rig hum and noise free. The pedal board is just one part of the rig. We do special utility boxes and interfaces. We build as small as possible and with the option to put one more pedal on the board in the future.
3) Which materials do you choose to build your pedalboard (Woods/Cable/Wiring) and Why?
We prefer to build upon flat pedal boards made of wood with an aluminum frame. They are easier to debug and survey. We focus on the shielding of the cable. We solder the cables to the connectors.
4) Building Process: At the first time building a pedalboard, we may encounter a lot of difficulties and trouble? Can you give us some advices and your stories?
Don’t put your Wah-Wah, Distortion or Compressor near the power supply. Get the best power supply you can afford. Go for a power supply with isolated, stabilized and filtered outlets. Try to avoid solderless cable kits. Learn the difference between DC voltage and AC voltage. Find out how much current (Ampere) your pedals draw.

Sound Of Silence is a Rig Builder based in Stockholm, Sweden. We do custom designed pedal boards and rack systems, audio installations for recording studios, film studios, home studios and audio consulting. Custom made pedal boards and cases in any size. We also have a repair service. Our clients are InFlames, Hammerfall, Opeth, Alice Cooper Band, Swedish House Mafia among others.
Saša From Pistolapedalboards.Com
1) Which aspects do you mostly focus on when coming to the pedalboard design and style?
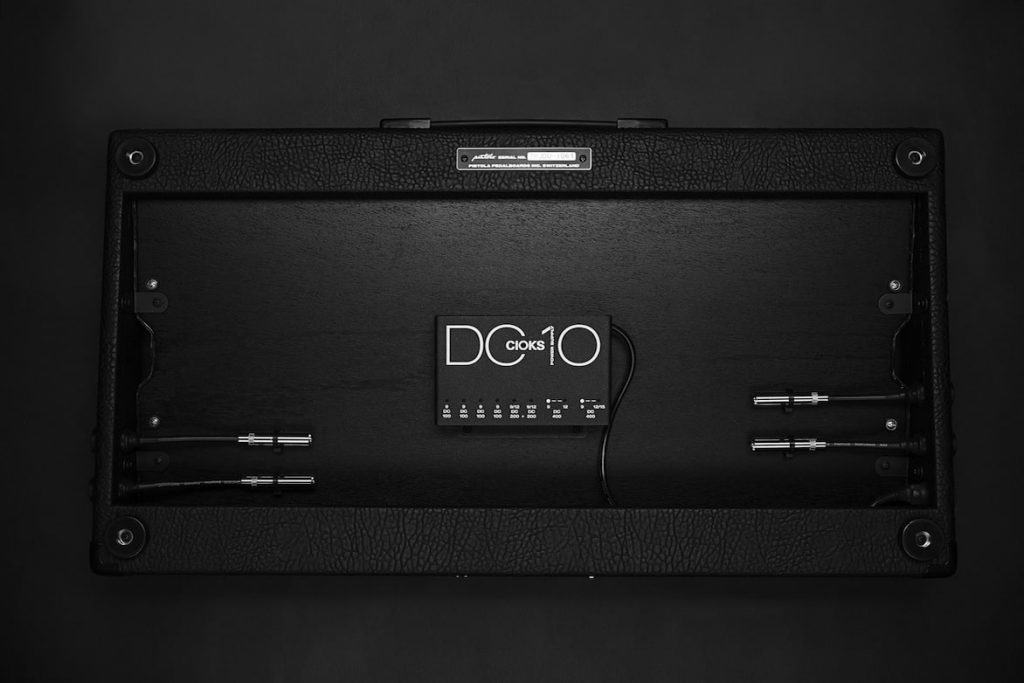
In general it is about quality parts & perfect manufacturing. The pedalboard has to be made great into the very detail. I need 2-3 days for gluing the tolex (original skai, sometimes even real leather) to the wood. All has to be perfect. There is no corner, no transition, where you can see the wood behind. Every part has to be fixed properly. The whole product has to be build to last a lifetime. That’s my goal. Built like a tank.
Design & style: design is more traditional. Guitarist are often conservative. They know the common design classics like fender, marshall etc. Amps. The design has to say: look at me. It is traditional, but something you did not see before. The design itself should amplify the quality impression of the product itself. Style: the customer can choose his preferences in hardware (black nickel, silver nickel) and the structure and color of the tolex itself. Also he can choose the size, bag or case, he cand send us his ideas and plans, often we use customers ideas. We offer about 10 to 15 different tolex designs. Also additional upgrades with real (embossed) leather design.
Our design is always leaded to be minimalistic. For the pedalboarbs itself, but also for our bags (very simplistic) and cases. Functional. Light weight, high quality, all handmade in Europe, no China production.
2) As a custom pedalboard builder, you definitely have some cool ideas and special features for your products. Can you share something about them?
Special features:
- Real (embossed) leather option.
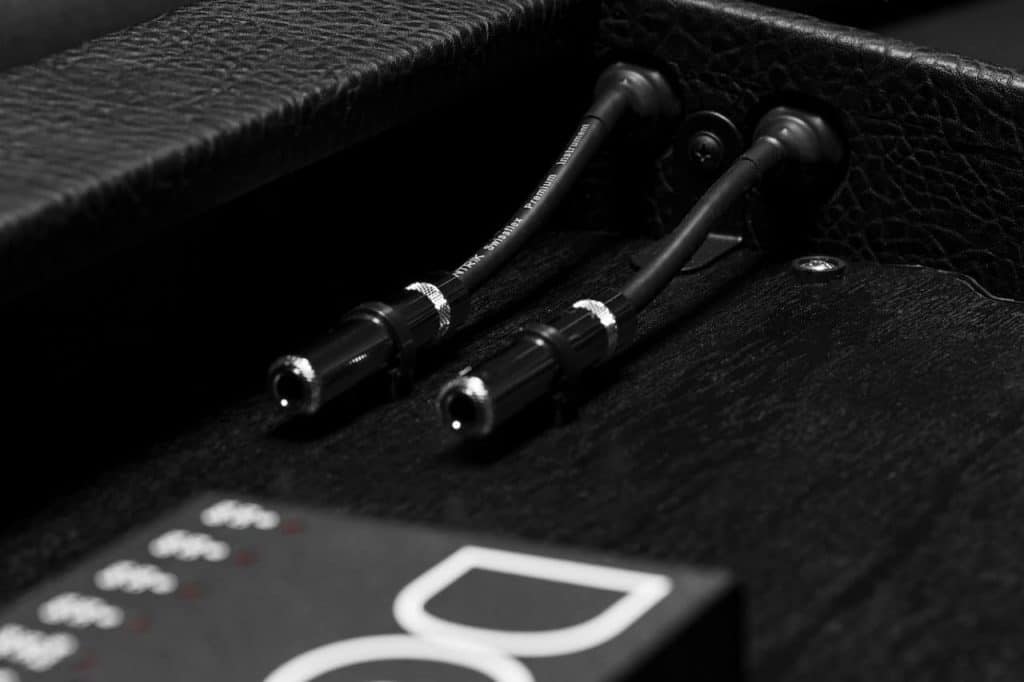
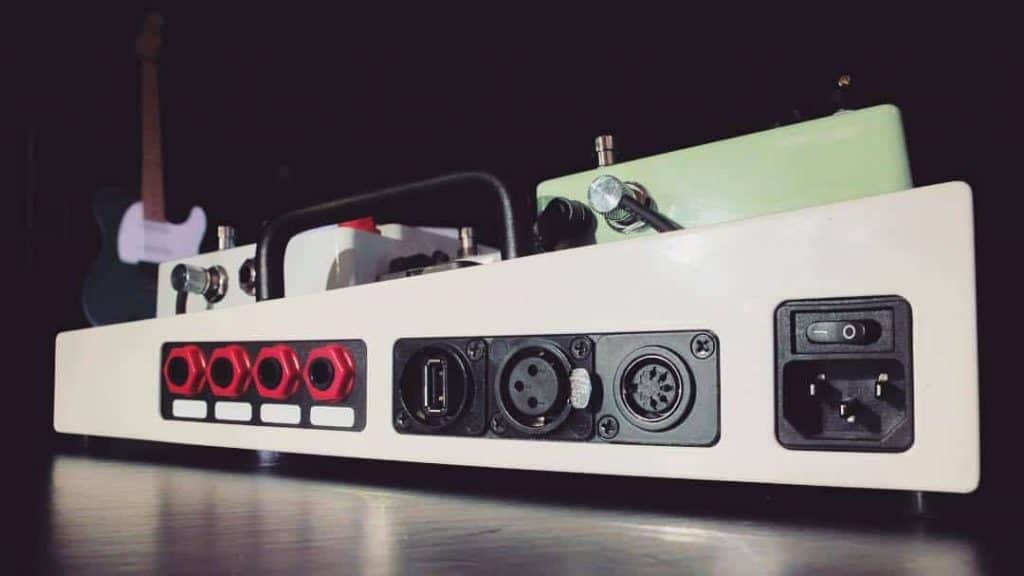
- Neutrik (NJ3FP6C) looking jacks/connectors are labeled! Options here are F.E. guitar, amp, send, return, amp2, guitar2, acoustic, stereo, footswitch etc…
- Divers connectors and their position on board: XLR connectors male/female, pin connectors, midi, jacks, usb etc…
- Only original Swiss parts: we are using Vovox cables and connectors or Neutrik parts & cables only.
- Power jacks/power cables: we use IEC C-13 looking power cables or optional Neutriks powerCON TRUE1 power cables.
- We do built in Cioks power supplies directly into our pedalboards. For free.
- In general: we care for the finishing like nobody else. The tolex has to be absolutely perfect matches to the pedalboard body, like a second skin. It gives a very nice quality touch to the pedalboard.
- Holes for cables: all cut out by a laser machine. Very precise, very professional.
3) Which materials do you choose to build your pedalboard (Woods/Cable/Wiring) and Why?
- Outboard: Poplar 18mm 9-plywood. Inboard: Poplar 10mm 5-plywood. Because it is light. Easy to work with.
- Cables/connectors/patch cables: Neutrik & Vovox, both from Switzerland, both high quality products.
- Original Skai tolex made in Germany. High quality tolex, easy to use, easy to glue. Will last forever, can not burst that quickly.
4) Building Process: At the first time building a pedalboard, we may encounter a lot of difficulties and trouble? Can you give us some advices and your stories?
- Make yourself a nice plan what you gonna build. If you know what you need and what you plan to build, you will make much less mistakes. The process will be quicker and straight forward. Get to know what you need. Plan it. Build it.
- When plan is done, wait another day, to check if you really want it this way. If you have no changes after 2-3 days, your idea is strong and you can be sure that you pretty much found out what you need. Plan long. Manufacture quick. If something is not clear, go back to basics or go ask others. Think logical as you build. There are no tricks, that you can not find out yourself. Just be open, think deeply, find solutions. There is always a solution.
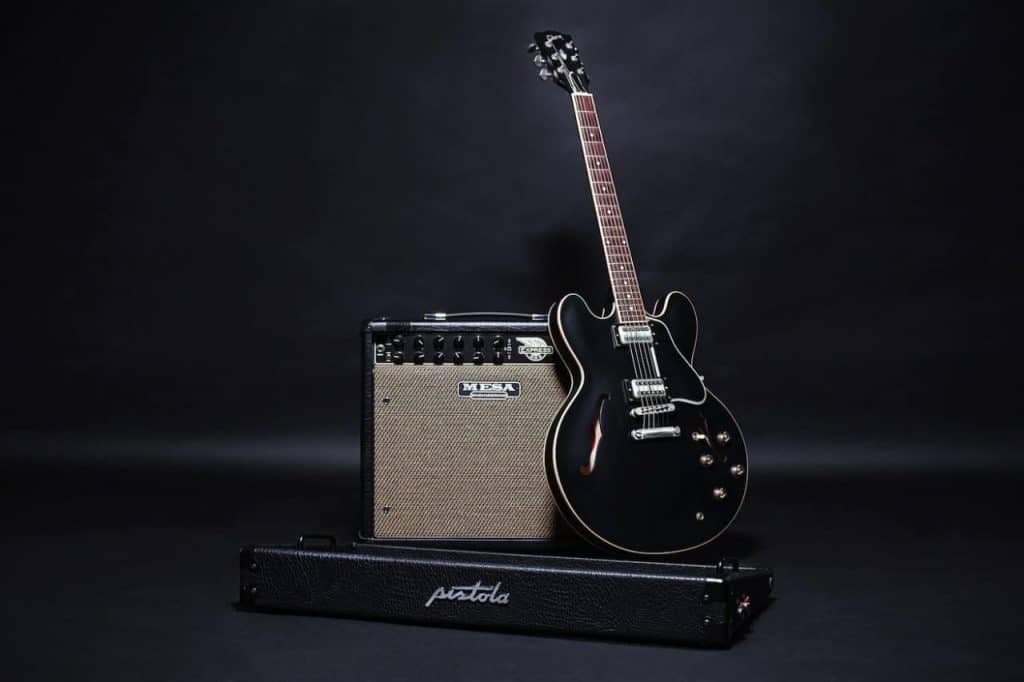
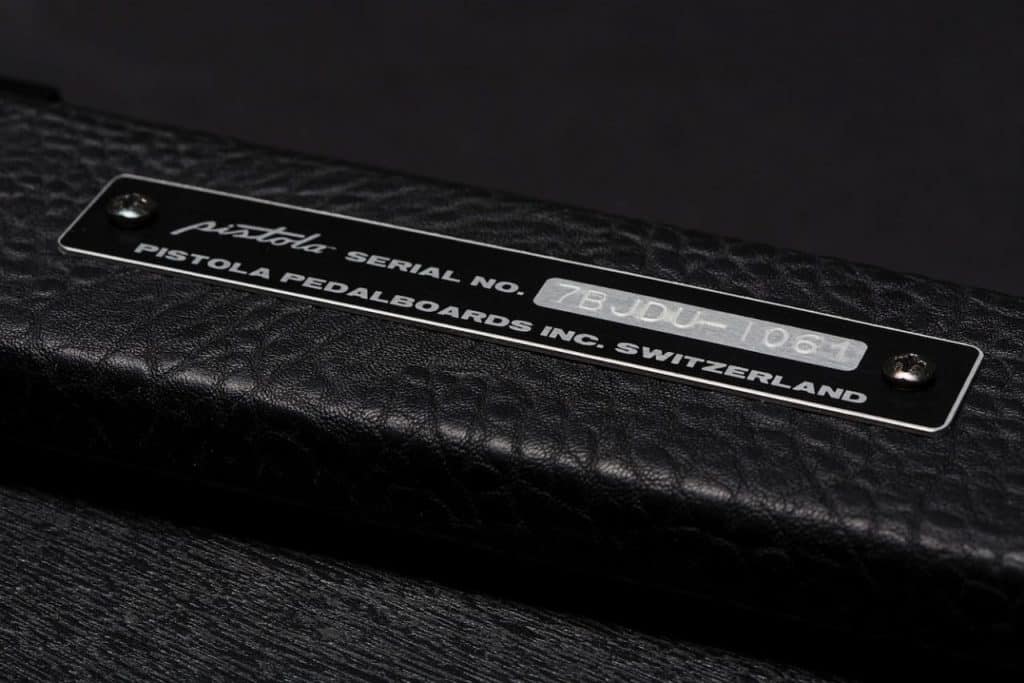

Pistola custom-made pedalboards are hand-built with passion and commitment to every detail to incorporate individuality and high-class manual workmanship. We equip all pedalboards with swiss quality connectors and cables from manufacturers as Neutrik™ or Vovox™. Pistola offers a complete custom-built-service under one roof. You can personalize now your guitar rig with an inspiring pro-pedalboard. Pistola sells directly to guitar players anywhere in the world.
Cas Bitner From Templeaudio.Com
1) Which aspects do you mostly focus on when coming to the pedalboard design and style?
When designing a pedalboard, you really have to consider all the aspects! I would say that looks, function, and price are all equally important. It has to look great so that artists are proud to make it a part of their rig. It has to be rigid and solve functional issues that arise on the road. It has to be relatively affordable so that it’s an option most people would consider. The balance of these three help create a pedalboard that everyone trusts and loves.
2) As a custom pedalboard builder, you definitely have some cool ideas and special features for your products. Can you share something about them?
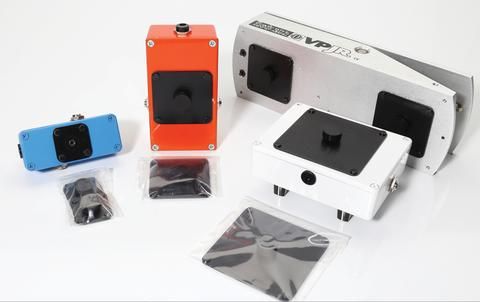
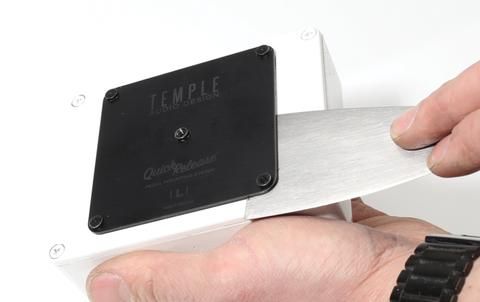
One of the main things that makes Templeboards unique is the Quick Release Pedal Mounting System a simple method of attaching pedals and power supplies without the use of hook and loop fasteners. Another aspect that makes Temple’s products stand out is the Modular Endpanels. These allow artists to easily configure power and audio connectivity on the side of their Templeboard without drilling holes and soldering cables. We offer several module options that the artist can configure the placement by simply removing/replacing a couple screws.
3) Which materials do you choose to build your pedalboard (Woods/Cable/Wiring) and Why?
Our boards are made out of lightweight aluminum and bent into a format that allows them to be extremely sturdy. Every part of the board (except for a some screws) is made out of aluminum. Even our largest board (TRIO 43 – 43” x 16.5”) weighs only 6.8lbs. The aluminum parts are then powder-coated; a paint process that is extremely scratch and weather resistant. All the electronic components we use in our modules are only the best quality because we believe every part of your signal path should be a pure as it can be.
4) Building Process: At the first time building a pedalboard, we may encounter a lot of difficulties and trouble? Can you give us some advices and your stories?
Plan ahead! I’m sure you’ve put a lot of thought into your signal chain already, but I’d recommend taking the time to do a “dry run” before committing to fastening anything to your board. Plan for cable spacing between the pedals by having the cable ends you’re going to be using in the pedals while laying things out. Once you have layout solidified I’d suggest fastening the pedal plates to your pedals (or other method if you’re not using a Templeboard). You can then begin installing cables.
If you’re cutting your own cables to length (ie. with solder less cables); leave some slack. Super tight cables can sometimes cause strain on the connection and make them cut out over time. You may think it’ll help keep the cabling clean by cutting everything perfectly to length but, especially if this is your first board, changes are likely going to happen in the future and you don’t want to be limited to those exact lengths. A bit of extra length can always be ziptied and cleaned up under the board.
Lastly… Invest in a quality isolated power supply! It’s not really fun dropping $150-$300+ on something that’s not a pedal, but clean power is so critical! Over time your pedal configuration may change substantially, but you can rest assured that you’ll have sufficient power channels and be able to avoid ugly interference as much as possible. Consider it an investment in your tone for years to come.

Temple Audio’s mandate is “From Artist to Artist”. We are musicians first. We strive to create a product experience that lives up to our own expectations. Temple provides solutions which allow the artist to focus on their music. We are always brainstorming solutions to make the artist’s tools into a seamless extension of their own creativity. Temple Audio Design products are proudly manufactured in Saskatchewan, Canada.
Troy From Stompin-Ground.Com
1) Which aspects do you mostly focus on when coming to the pedalboard design and style?
There are many but pedal layout and overall size are important factors. We consider the type of stage environment and transportation needs of where you perform. Do you play mostly small clubs, large venues, fly-in TV engagements, in a private studio, etc. Do you get there via a personal vehicle, large truck, public transportation, air travel, walking, etc? All these may require vastly different designs for not just the pedalboards but also the cases they go into.
2) As a custom pedalboard builder, you definitely have some cool ideas and special features for your products. Can you share something about them?
Probably our coolest feature is that we can make practically any type of pedalboard and build a perfect custom case for your rig… or your existing pedalboard… or any other gear for that matter. We’ve also built pedalboards for existing cases the clients already had and wanted to re-purpose it. Everybody is different. So whether you need a giant 50″ x 30″, 4 tiered monster that lives in a studio or a small lightweight rig that needs to fit in the overhead compartment of an airplane, we can do it.
3) Which materials do you choose to build your pedalboard (Woods/Cable/Wiring) and Why?
For most flat single level pedalboards, we use a fairly thin composite panel to keep the pedals very close to the stage that’s simple, ergonomic and effective. Angled or multi-tiered boards typically use thicker 1/2″ birch plywood since it has more mass to install bolts, screws, support open spans, etc. Occasionally we’ve used a semi hollow engineered panel to further reduce weight. To allow different pedal mounting methods, the tops are either laminated with Velcro loop material or an ABS sheet for a hard top type pedalboard. Our cases use 1 of 3 panels as a basis, thermoformed ABS for light weight, plywood/ABS laminate for ultimate strength or the semi hollow panel for the best of both worlds. All those make a very tough case that will serve you well, time after time.
4) Building Process: At the first time building a pedalboard, we may encounter a lot of difficulties and trouble? Can you give us some advices and your stories?
Don’t be afraid to jump in and just create. And if it doesn’t turn out quite right, rethink it, chop it, rearrange or start over. Once you have something that you really like, consider investing the money you saved in a nice custom case to protect your valuable pedals.

Stompin-Ground.com has been making the best pedalboards and touring cases since 1983. We also manufacture several unique accessories including hard to find custom audio and power cables to meet the needs of the working professional. We round out our offerings with a nice selection for the do-it-yourself-er. Great solutions that simply work!
Cathy From Tonezonela.Com
1) Which aspects do you mostly focus on when coming to the pedalboard design and style?
Functionality, both comfort & operation.
2) As a custom pedalboard builder, you definitely have some cool ideas and special features for your products. Can you share something about them?
As a professional pedalboard builder, our main focus is listening to the client and tailoring the build to their specific needs. ToneZone LA can definitely accommodate custom built interfaces or other specific audio and/or power requirements; examples would be creating custom wired patch bays that can handle MIDI, XLR Direct Outs, Multiple Amp function switching, Expression Pedals, Custom Built Buffers at any point in the signal chain, and on & on.
3) Which materials do you choose to build your pedalboard (Woods/Cable/Wiring) and Why?
We have built a great number of Pedalboards using Pedaltrain pedalboards; not just because we are an Authorized ‘Pedaltrain’ Dealer, but because it just happens to be a popular vehicle with a great number of Guitar/Bass Players out there. Pedaltrain pedalboards are a excellent value and a convenient, lightweight product that rings with a lot of players out there. We do offer flat, traditional wood-style pedalboards as well, custom made for us by the folks @ Encore/A&S cases. What it really boils down to, is what the client is comfortable & happy using, whether we provide it for them or they supply it for us. Pedaltrain pedalboards and similar type aluminum pedalboards provide minimum weight, complete surface area for mounting and convenient power supply positioning; flat ATA style pedalboards are usually chosen for alternative comfort, and custom size surface areas, for larger scale boards.
4) Building Process: At the first time building a pedalboard, we may encounter a lot of difficulties and trouble? Can you give us some advices and your stories?
The biggest common mistake in people that are doing their first pedalboard is not leaving enough space for connectors, cabling and operation. I know this sounds ridiculously obvious, but we see it time & time again. Connectors (both DC & Audio) take up physical space, as do whatever cable you use. It is as important as any pedal you are mounting. One other sliver of advice we will impart; building a pedalboard can be extremely simple & straightforward depending on the number of pedals involved or it can be extremely involved, again, depending on the number pedals and/or components (example: loopers etc.), involved.
A good pedalboard builder is a skilled technician, and those skills are accumulated knowledge of products, specifications, electronics and real world musical experience; all those skills have value when it comes to creating an instrument, yes I said creating an instrument, your pedalboard ultimately becomes an instrument, as important as your Guitar and Amplifier. At ToneZone LA we have provided and built products, such as our “Pedalboard Junction Box” interface, for the ‘do it yourself’ – however, if your project is beyond your comfort level, of ‘doing it yourself’ then we highly recommend you don’t, and hiring a professional to build it for you. Yes, it will cost you, but it is ALWAYS more expensive to fix after the fact.

ToneZone LA is owned and operated by Bob & Cathy Lauer. We are a Custom Design/Wiring Specialists for Pedalboard, Rack Systems & Pro Audio. Cathy Lauer is a professional guitarist/musician/technician of many years plagued with an obsession for TONE. Authorized dealer for: Pedaltrain, Voodoo Labs, Decibel 11, JHS, Strymon, Wampler, Xotic, Source Audio and many more. Clients include everyone from the weekend warrior to the touring professional.
Chris From Custompedalboards.Co.Uk
1) Which aspects do you mostly focus on when coming to the pedalboard design and style?
What items are going in, size, weight, power, patch, input/output, what amps & guitars are being used.
2) As a custom pedalboard builder, you definitely have some cool ideas and special features for your products. Can you share something about them?
We treat every board as it comes so each has its own set of special features. But our most unique feature I would say is our hinged tier design.
3) Which materials do you choose to build your pedalboard (Woods/Cable/Wiring) and Why?
We make all our boards from flight case materials to give them the strength they need to survive life on the road. We’ve not had a single 1 break!
4) Building Process: At the first time building a pedalboard, we may encounter a lot of difficulties and trouble? Can you give us some advices and your stories?
- Always consider size and weight, do you really need 4 reverb and 6 overdrive pedals?
- Be ruthless and get that size and weight down as much as you can.
- Always consider powering your pedals properly.
- Always consider decent patch cable and plugs.
- Your pedal board, as far as the signal is concerned, is only as good as the weakest link.

CPB is now in its 6th year and going from strength to strength. As well as custom pedal boards, we also stock power, cabling, loop switchers, patch boxes, pedals. We even have our own brand of pedals and routing solutions!
We’ve tried to make our website a 1 stop shop for everything you would ever need for a pedal board, and if you dont see it, we can either custom make it or get it in stock, just ask!
Greg From Xacttone.Com
1) Which aspects do you mostly focus on when coming to the pedalboard design and style?
Our in-house design process begins with the client’s ideas and ends with a reliable and user-friendly stage or studio solution. We typically have a consultation meeting with the client to discuss their needs, wants, concerns, and application.
Signal Integrity is our primary focus. Ideally, after a system is built, each pedal or combination of pedals should sound just like they would outside of the rig as the only elements in the signal path. This means accounting for system impedances, minimizing noise floor, and host of other considerations.
Weight is a key issue for a majority of our clients due to the rigs having to travel safely and cost effectively.
Layout is another key factor in designing the rig. Layout will affect the size and weight of the pedalboard as well as affecting the accessibility of devices on the board.
Power Requirements will affect the size and layout. It affects the power supply and/or power supplies that will be needed to power all of the devices on the board. Pedals with nonstandard power requirements may force us to accommodate a wall-wart to power that pedal. Pedals with AC cords complicate things a bit. EHX Deluxe Memory Man delays are very popular with many of our Nashville clients – the old ones have AC cords that have to be accounted for. Accommodating an AC cord may add some size to the pedalboard.
2) As a custom pedalboard builder, you definitely have some cool ideas and special features for your products. Can you share something about them?
The heart of many of our pedalboard builds is an XTS Custom Pedalboard Interface. The pedalboard interface facilitates using the integrated system in many different applications without have to disturb the wiring on the pedalboard itself. An interface can allow you to run mono, stereo, dual mono, route the time based effects to a FX loop, lift grounds, change signal polarity, transformer isolated outputs, connect footswitches and the list goes on and on. We custom build interfaces to suit each client’s particular needs.
With our engineering capabilities, there are few limits on the types of guitar-related products we are able to produce. We are capable of designing a solution to almost any signal chain or system control problem the client may have. This includes custom effects pedals, pedal modifications, buffering, mixers, amplifiers, pedalboard and rack interfaces, effect routers, and nearly any other device that goes between your guitar and your speaker cabinet. This allows us to do jobs that other firms don’t have the ability to do from an R&D perspective.
3) Which materials do you choose to build your pedalboard (Woods/Cable/Wiring) and Why?
All of our flat and/or custom boards are made of high grade plywood with laminate top and bottom. These materials are a good compromise between weight, strength, durability, and cost. We started fabricating our own boards in-house several years ago due to vendors not being able to supply boards built to our specifications in a timely manner.
We recently built several custom pedalboards for Matt Followill of Kings of Leon. Because everything we do is custom, we were able to build something that was exactly what he needed. It has a pitched tier for his controls as well as a latching hinged second tier that holds pedals and covers the switching system, power system, and system interface.
We use a variety of cabling but as a rule Mogami 2319 works well on the pedalboard itself and Mogami 2524 works well for the stage lead cables going to and from the pedalboard.
4) Building Process: At the first time building a pedalboard, we may encounter a lot of difficulties and trouble? Can you give us some advices and your stories?
For the beginner, power is the most overlooked aspect of pedalboard building. A poorly suited or overloaded supply can lead to all sorts of noise floor and system stability issues. Selecting the best suited power supply system is critical to good system performance.
Mechanical, solder-less connectors have opened the world of pedalboard building to lots of folks. There are lots of very good solder-less products available, nearly all of which, when assembled correctly, perform better than a poorly made soldered connection. However, many of the issues we see in DIY pedalboard setups are due to solder-less connectors and are remedied by replacing cables with high-quality, long-lasting soldered types.

The XTS Custom Shop in Nashville, established 2011, builds some of the world’s best guitar rigs. Each one is as unique as the person playing it. From a few pedals, to huge racks; from small true-bypass loop switchers, to large MIDI controlled FX routers; we have the experience and the expertise necessary to build the best performing and sounding guitar effect systems.
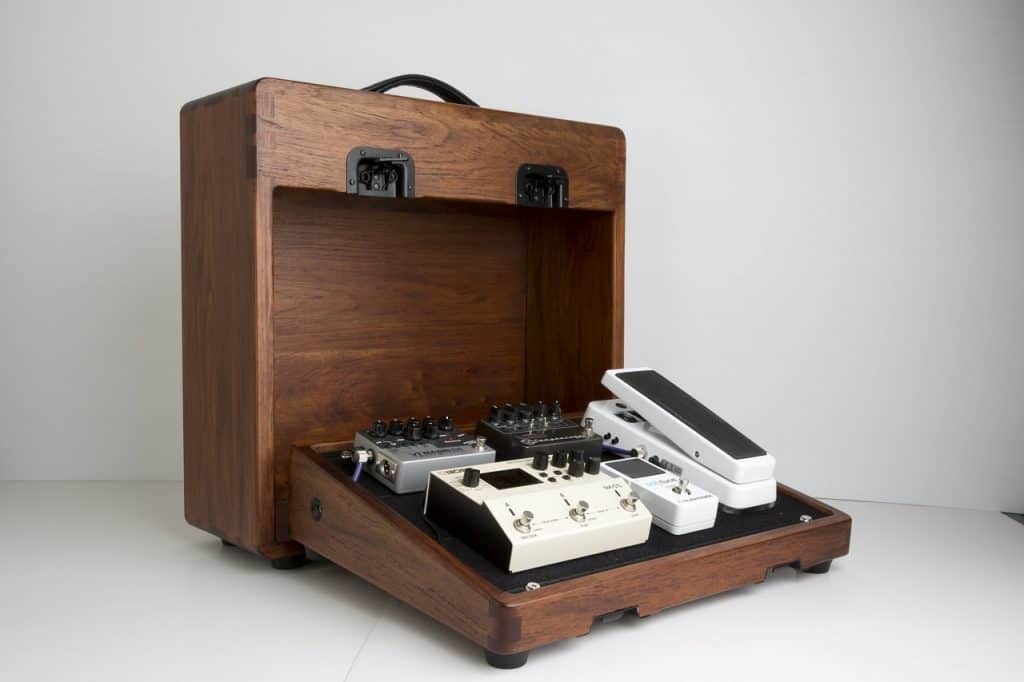
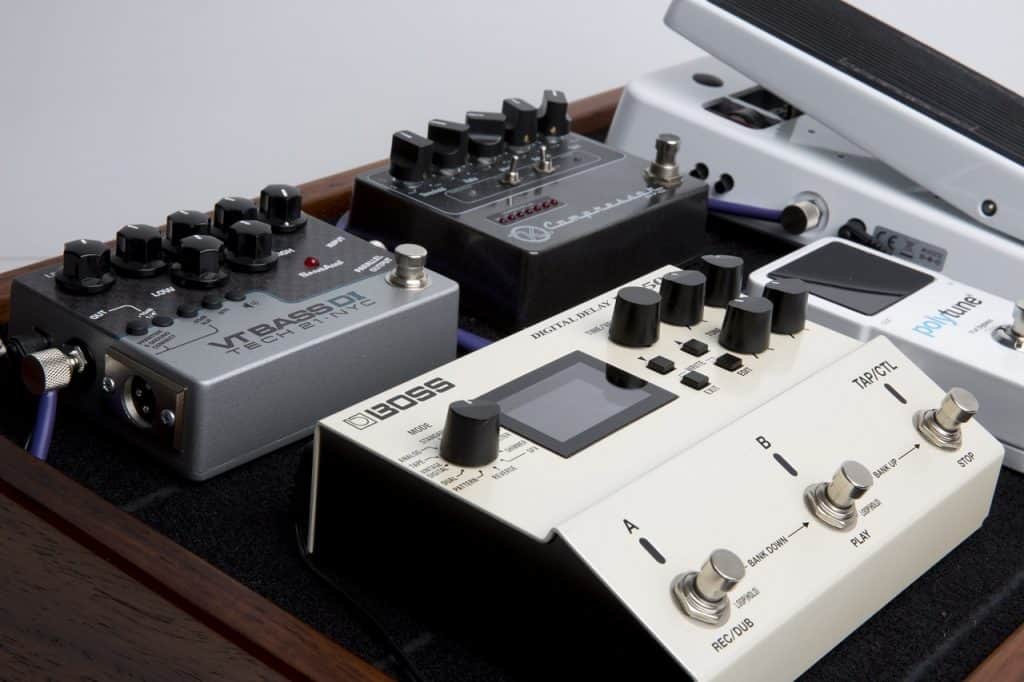
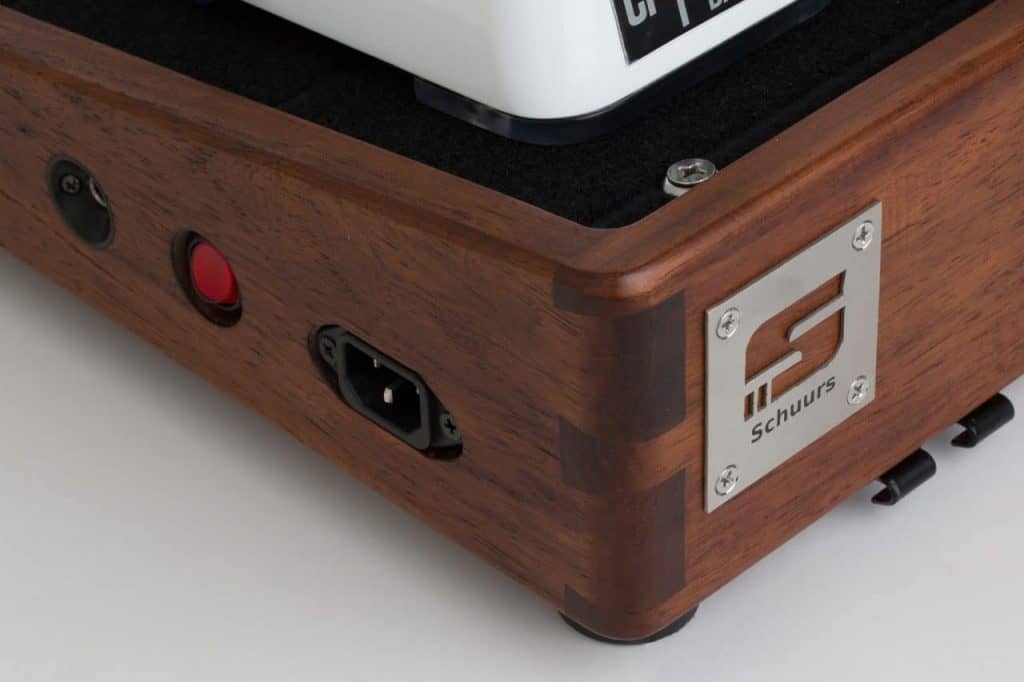
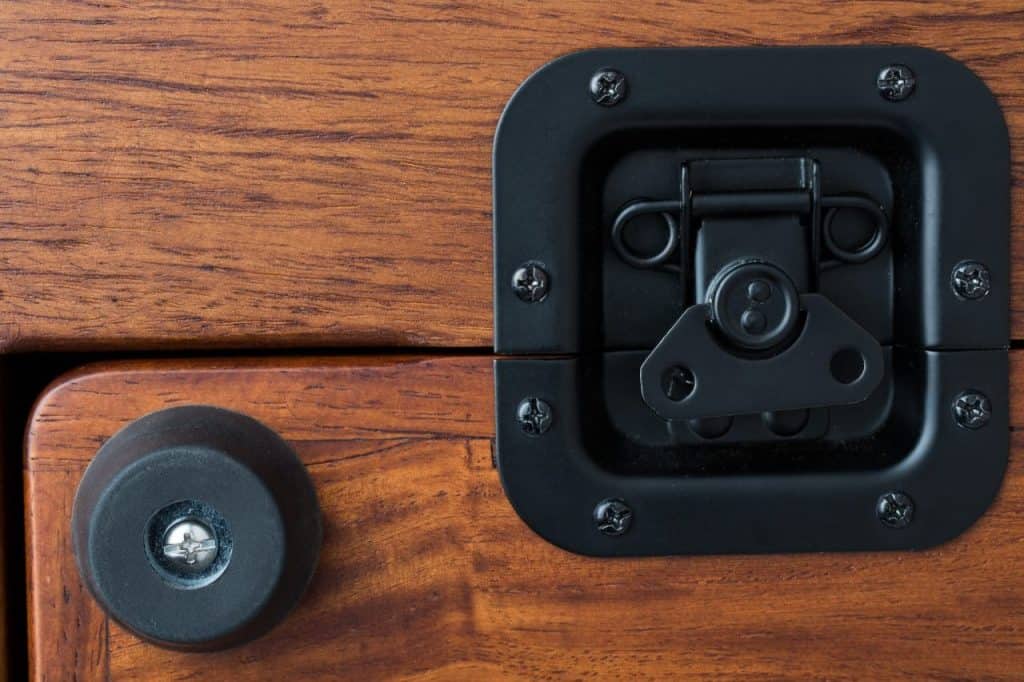
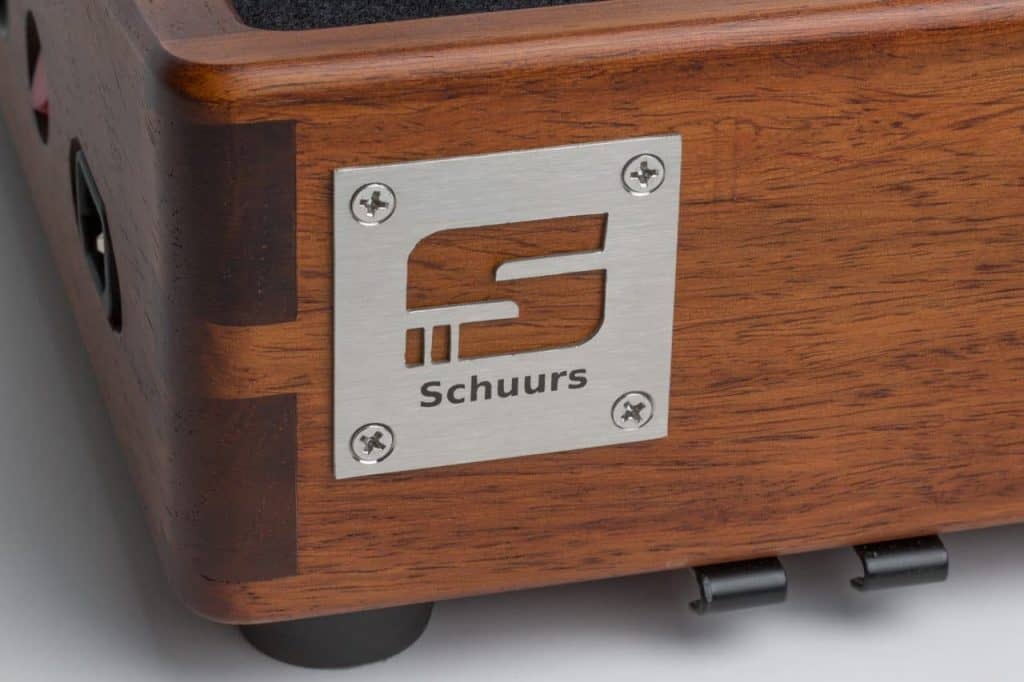
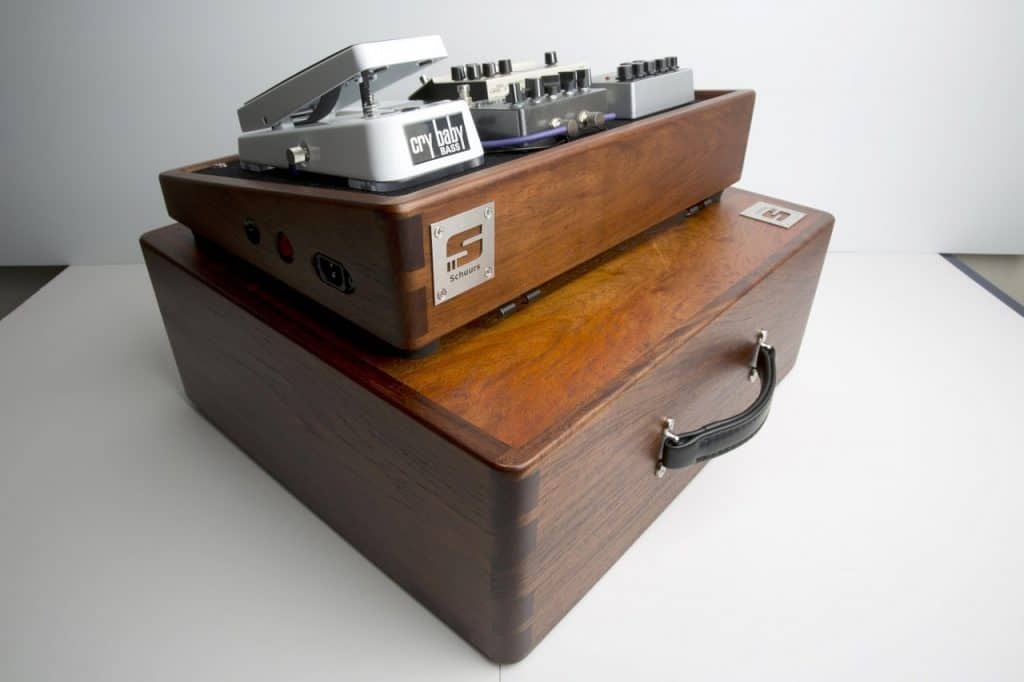
Brad From Schuursproducts.Com.Au
1) Which aspects do you mostly focus on when coming to the pedalboard design and style?
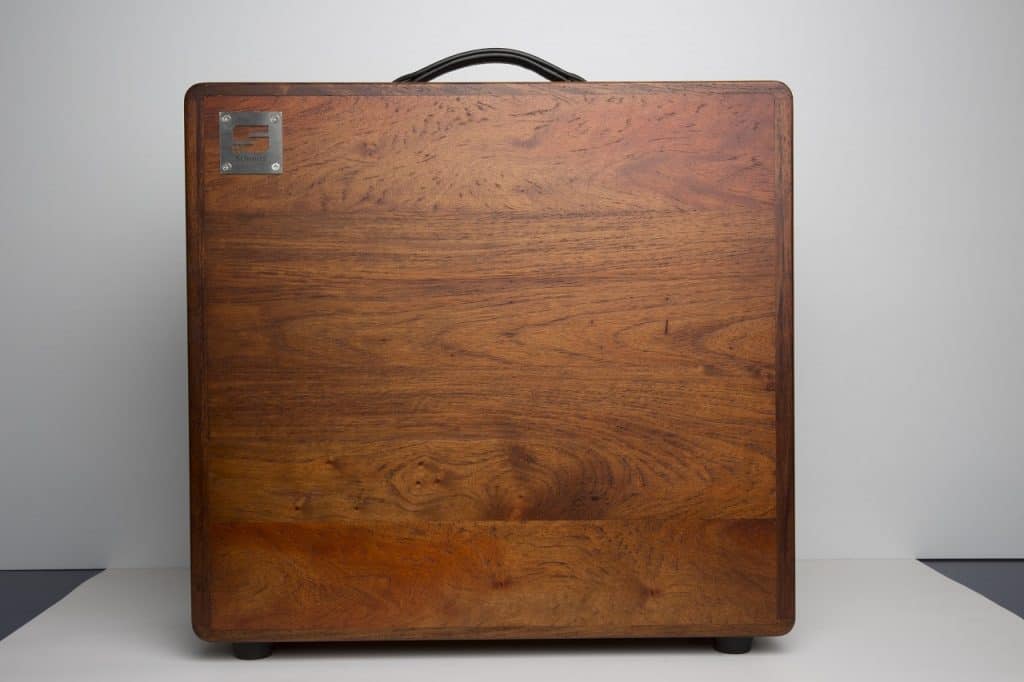
For me it is just as much about the wood as it is about the music. A pedalboard needs to be a functional work of art that you can relate to – like the instrument that you play.
In terms of design, not only must the board be the correct size to accommodate the necessary pedals, but it should also have the correct geometrical proportions that allow for classic clean modern lines and properly positioned jacks, power connections and other hardware items.
The style of a pedalboard needs to reflect its owner and environment of which they play. My particular style is conservative which caters to a unique clientele that range from a studio musician to a wedding performer but not excluding the artist at home who likes a touch of class in his home office. Nevertheless, features such as timber types, finishes, jacks, hinges and handles can be modified to suit taste without losing its high-end appeal.

2) As a custom pedalboard builder, you definitely have some cool ideas and special features for your products. Can you share something about them?
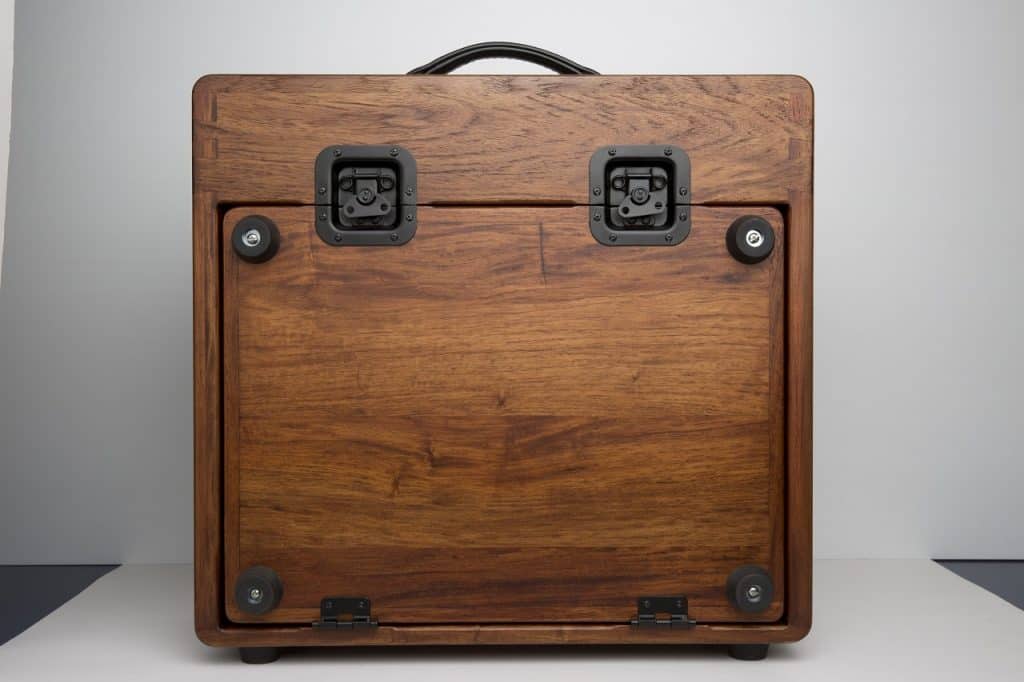
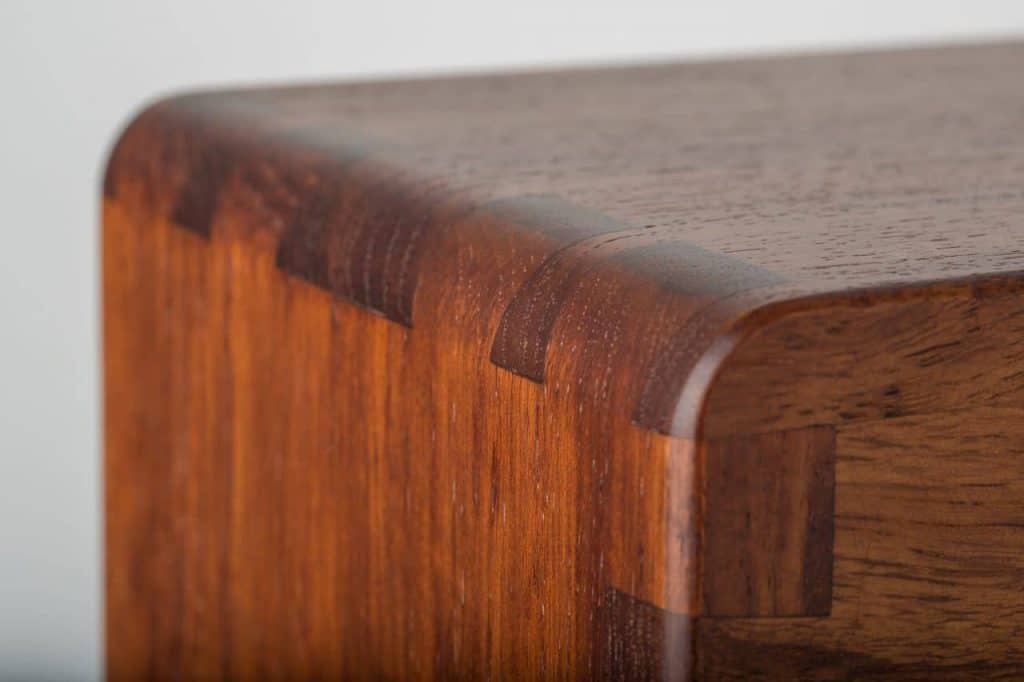
Joinery – I hand cut dovetails on all corners of the pedalboard frame and case. People have asked why I don’t just use a machine to save time, but you don’t get the same ‘handcraftedness’ from using a router.
Jacks – Solderless black Telecaster syle jacks are used throughout the board. Not only to they look amazing but they are super easy to install and are ready to go when wiring the pedals.
Solid Base – I enclose the bottom of the pedalboard frame to minimise dust build up on the wiring and powersupply. It also keeps everything under the hood clean and maximises mounting options.
Hinges – Black powdercoated break-away and butterfly hinges are used on the board and case for quick release and give a real industrial aesthetic to the design.
Flush fitting switches, jacks and power inlets – I used to screw these on the outside of the frame but recess them all now. Way classier and not only does it protect everything from getting the occasional bump it also allows the board to fit smoothly inside the case.
3) Which materials do you choose to build your pedalboard (Woods/Cable/Wiring) and Why?
I am definitely a wood guy ???? The timber type that I favor for everything except the deck is New Guinea Rosewood. It is a durable hardwood but not much heavier than pine (softwood). It ticks all the boxes as it machines well, cuts clean with hand tools, has an attractive grain pattern and finishes beautifully.
For the deck I use marine grade plywood so there is minimal movement if exposed to radiant heat while still maintaining strength and a full timber grain appearance throughout the entire project. The board and case is on the heavier side but the trade off is worth it.
4) Building Process: At the first time building a pedalboard, we may encounter a lot of difficulties and trouble? Can you give us some advices and your stories?
Many people will recommend having a plan of what you want to build first – this is 100% true. It doesn’t matter if you compose it on a 3D modelling computer program or rough sketch it on your wife’s shopping list, have a clue about what you want to make. I would suggest drawing a number of 2D or 3D sketches labelling all the components and sizes of the board including pedals. Then list the steps in order of how you are going to make it. This will give you a clear direction and minimise unnecessary difficulties.
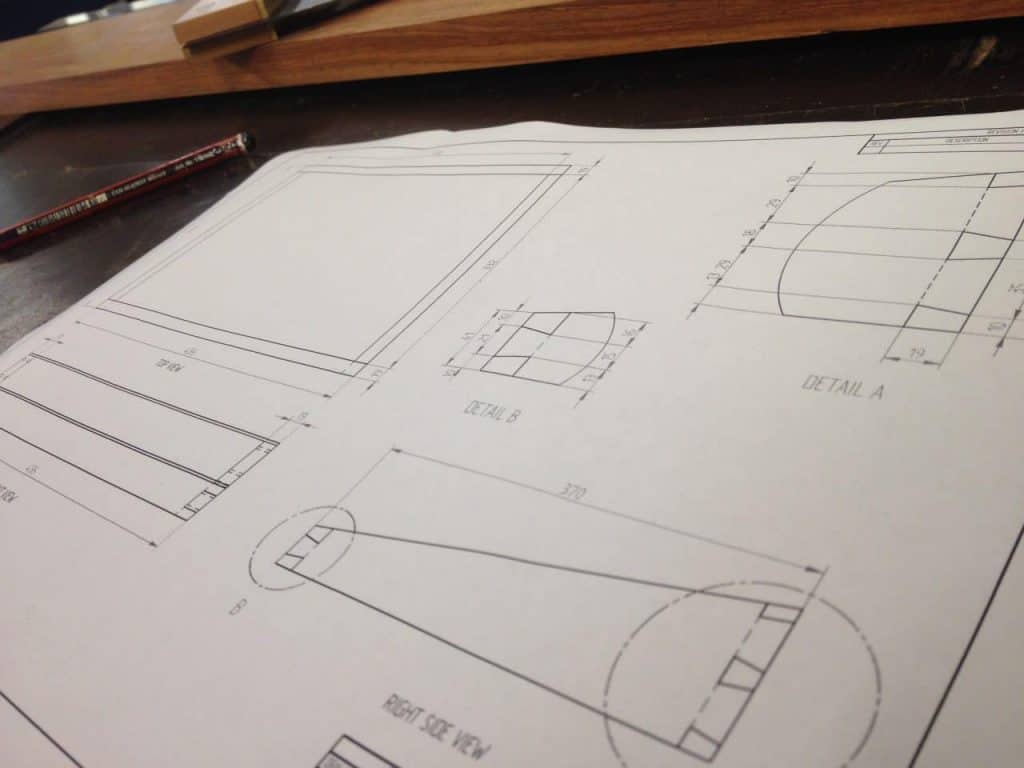
When making one of my first boards I got so caught up in the joinery of the frame and gluing it all together that I forgot to make the cut-outs for the jacks, switch and power inlet. Not impossible to get around but it is much easier to carry out these steps before the assembly process and save some heartache. Some people that ask me for advice will share with excitement that they are doing a woodworking course to hone their skills. This will ultimately make them better boards and other cool stuff too. Not a bad idea if you are not naturally ‘handy.’
If you are going to do the wiring yourself use quality cable and jacks, a decent soldering iron and multimeter. I highly recommend custom making your patch cables to minimise as much noise as possible and it makes your rig look professional and tidy.

Schuurs Fine Timber Products is committed to designing and creating timber products that compliment and reflect your lifestyle. Our strengths lie in creativity and excellence as we combine classic and modern styling to create something that is truly you, a functional piece of art that can last for generations.
John & Bruce From Creationmusiccompany.Com
1) Which aspects do you mostly focus on when coming to the pedalboard design and style?
Oh that’s a great question. When we started almost 5 years ago, so much of what we did was about the looks, and still is. We really wanted to make something that was stunning and full of character. Last year we redesigned our main boards though, and when we did, we really wanted to cut down on weight for all the touring guys we’ve worked with and make it even stronger and retain as much of the handcrafted look as possible. A lot of what we do also has to do with function. The slot layout, and the height really play into how we believe most people will set up their boards. I guess what I’m getting at, and I know it may sound cliche’, is we really try and focus on everything as much as possible to make the best board we can.
2) As a custom pedalboard builder, you definitely have some cool ideas and special features for your products. Can you share something about them?
Absolutely. I touched on some of our features in the previous answer, but something we think is really special is our unibody design. The center is 0.1” aircraft grade aluminum that has turned down edges so that it is crazy strong. In fact, the end panels actually don’t lend any structural support. You can stand on the frame by itself. Some other cool features are our electronic options and our Velcro Overlay. Our electronics basically allow you do bring any connection you’d need right on the side of the board. Our Velcro Overlay is something really cool. We laminate the sheets of low profile Velcro to the adhesive in house and then laser cut it to the exact layout of our top decks. It gives you total coverage on the top of your board and the low profile Velcro holds like CRAZY versus conventional hook and loop.
3) Which materials do you choose to build your pedalboard (Woods/Cable/Wiring) and Why?
On our Elevation Series we use a combination of materials. The center unibody is aircraft aluminum like I mentioned, and then the end panels are either select hand finished hardwood or baltic birch plywood wrapped in various colors of tolex.
As I mentioned earlier, we used to have a previous design that was an all hardwood or wrapped plywood frame, but we had to discontinue that design, which inspired us to go back to the drawing board and improve on what we had. The reason we do the frame we do is it was the strongest design we tested and was significantly lighter than our previous boards. The end panels are essentially for looks and a place to mount various I/Os.
4) Building Process: At the first time building a pedalboard, we may encounter a lot of difficulties and trouble? Can you give us some advices and your stories?
Oh man. Yes. So many failures and I’m thankful for all of them. Quality tools definitely help. The biggest learning experience for me personally was adhesive. I think we’ve been through 13 or 14 different adhesives for tolex and Velcro, and then went through it again when we came out with a peel and stick Velcro overlay trying out all sorts of different adhesive tapes. Always use an adhesive that’s rated for high heat or else your tolex will fall off in the summer. We prefer water based tolex adhesive for most things at our shop.
Another big one is just time. Take your time and don’t give up. Work through your mistakes. Sometime in our first year, we were having trouble with adhesives and were trying to find a solution. I think we had gone through 7 or 8 different ones in a week trying to solve a problem. We finally found that would work and I saved the test piece and wrote “Keep Moving Forward” on it in sharpie and keep it in my office. It’s a lame “mantra” if you will, but I keep it as a reminder to not give up. The same thing is true for any woodworking project. We have thrown away our fair share of boards and cabs that we screwed up, but you have to just keep trying.

Well, my Father and I started as a hobby side business for fun. We never intended for Creation to be our FT job. About 6 months in though, we were starting to get a following and orders were coming in and my Dad who was going on 60 got laid off. So we asked ourselves if we wanted to go “all in” so to speak. At that time my brother offered some seed money to invest and he has been a background owner since then taking care of our books. It’s been a wild ride and business ownership has definitely been a long journey, but I love what I do every day. Since then, we started making other accessories on top of pedalboards like cables, wiring setups, laser engraved hardwood volume pedal toppers. And last year we actually acquired Risen amps and re-branded them to Creation. Our goal is to build things we love and give our fellow musicians the best service possible.
And Now… It’s Your Turn!
You have just found a lot of useful tips and some cool new ideas for your upcoming pedalboard project, haven’t you?
There are some builders rejected to share their experience with DIY community so once again, I’m really appreciated the valued information that the invited guests provided. If you are looking for having the professional built ones for you, don’t hesitate to have a look in their galleries and choose the one you love most!
Want to share your cool stories? Feel free to comment below or send me a message here.