We all know that there is really only one way to sound like a guitar pro, and that’s to practice, practice, practice; but there really is more to it than just technique.
You have to have a basic understanding of the signal chain that leads from the guitar to the amp, otherwise all that hard work you’ve put in learning your instrument won’t really be all that useful. Learning what the optimal pedalboard order is and why it is that way, is just as important as learning the songs.
For the beginner, this can seem like a daunting challenge, but sometimes even someone who has been playing for a while might not fully understand why a certain effect should be placed in a certain sequence. This article aims to answer that question to ensure that when you go out on stage – or just play at home for friends and family – you sound like a real pro.
1. What You Will Need
Before we begin, we need to establish some parameters. The sheer number of effects out there means it would be impossible to try to include all of them in our hypothetical signal chain, so instead, we’ll choose the 11 most commonly used effects and set them up in a signal chain that makes the most sense. To get started you will need:
1.1. A Pedalboard
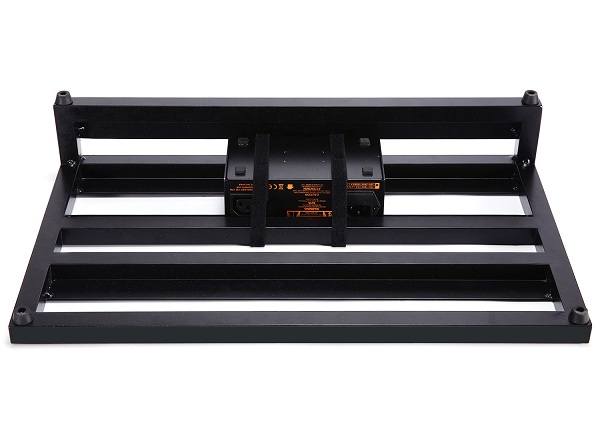
The form this takes is purely a matter of personal preference. A lot of beginners start out with a simple slab of plywood. To determine the size and shape, it’s advisable to lay out all of your pedals on a sheet of cardboard in a manner that makes the most sense to you and your playing style.
Some people lay them out in orderly rows, while others prefer to form them into an arc. Again, it’s purely up to you.
Draw a rectangle, oval, polygon or shape of your choice around the perimeter of the pedals. It’s advisable to leave a couple of slots open in case you want to add more effects later.
Also, don’t forget to leave enough space between the effects so you can plug them in. Cut out the cardboard shape and use it as a template to transfer to a board or sheet of plywood, then cut out board to the shape of the template. You can use strips of Velcro to attach the pedals to the board.
Alternately, you can buy a premade pedalboard – there are plenty on Amazon.com. The Donner DB-3 Aluminium Pedalboard with Bag is a highly rated aluminum pedalboard that comes with its own padded case. The Gator G- LGW Tour Series Pedal Board is a great choice for the touring musician as it comes with its own built in flight case for those rugged road trips.
1.2. Effects Pedals
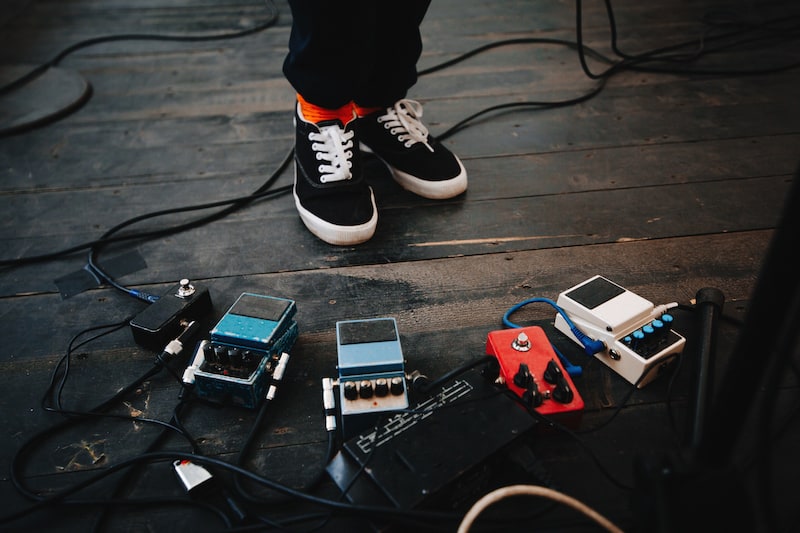
This article will demonstrate a signal chain for up to ten pedals, but many beginners start off purchasing one effect at a time as they need them. I would definitely recommend starting with a tuner.
You can’t go wrong with the Boss TU2 or the TC Electronic Polytune 2 Mini. Both have been around for a long time and are well-respected. A good selection of pedals for the beginner – no matter the style of music are:
- Compressor pedal – What does it do?
- Overdrive/Distortion
- Chorus Pedal – Check my in-depth review
- Delay
Feeling overwhelmed? Hold on… and get started with these 7 essential types pedals.
1.3. Connecting Cords

You will need some way to connect the devices in series. There are 2 options for doing this without wasting any space.
The first is to use a short cord with 90 degree angle plugs like these Mogami 6 inch patch cables that come in a pack of six. Otherwise, you can use an all-in-one device like this Donner Pedal Coupler.
1.4. Power Supply
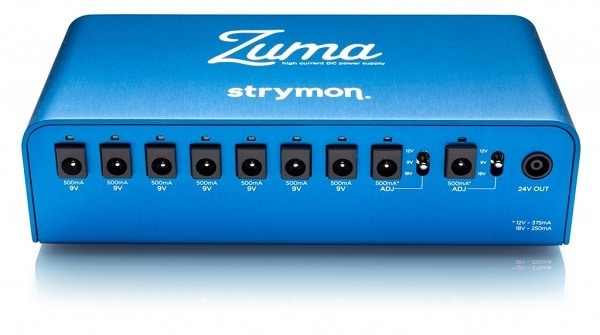
Almost all pedals have the option of using either a 9-volt battery or power supply that plugs into regular AC power outlet.
Most touring musicians use an independent power supply as it saves them from constantly having to change batteries, or, heaven forbid, have a battery go dead mid-set. For the rest of us, however, it’s not a big deal to swap out batteries when one goes dead.
2.Signal Chains
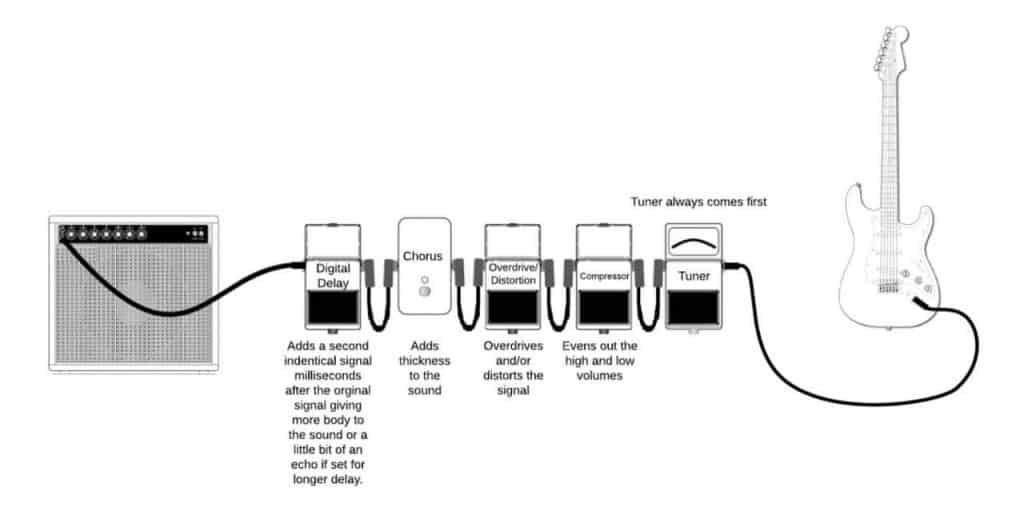
2.1. The beginner chains
The basic chain with the five most basic effects. The key thing to keep in mind is that when a pedal is on, the change that it is making in the sound will be further modified by other effects downstream. Putting an overdrive/distortion at, or near, the front of the chain makes more sense because that distorted sound will essentially be the original signal that will then be modified by other effects.
Placing it at the end, or near the end, means you will be adding overdrive or distortion to an already heavily modified clean sound and the result can be muddy and unpleasant. You really can’t swap effects around in this basic layout.
TIPS!
The compressed signal from the guitar evens out the highs and the lows, that signal is then boosted through the overdrive/distortion, thickened with the chorus and finally a little delay is added to enhance the live feeling of the sound.
2.2.Essential Rock Chain
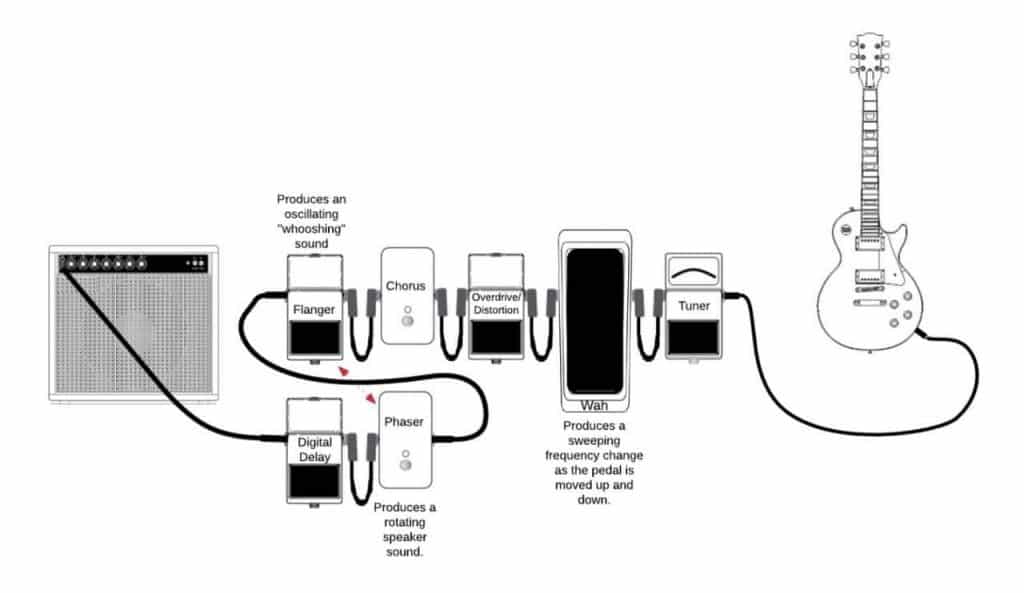
In the chain shown below, which is a popular chain with rock artists from Slash to Tom Morello to Lzzy Hale, we add a wah pedal, flanger and phaser and see that there are some interesting things we can do with this layout.
Pretty much universally, you want to set the wah up in the beginning because you will be sweeping the frequency of the original signal up and down. Putting any effects before that would have really weird and unexpected results. Unless you are into VERY experimental music, it’s probably best to avoid this.
On the other hand, you can swap the position of the flanger and phaser around.
When the flanger, which produces a “jet plane” type whooshing sound, comes before the phaser which was meant to sound like a rotating speaker where the sound goes toward and then moves away from the listener.
TIPS!
When the flanger comes first in the chain, it acts like a reverb set at a very long “slapback” where a distinct echo is heard. Think of the breakdown on Ted Nugent’s Stranglehold.
Switching the phaser to behind the flanger produces a sort of “spacey” sound. If you have ever heard the guitar intro to Billy Thorpe’s Children of the Sun, you’ll recognize this sound.
2.3.The Opening Act
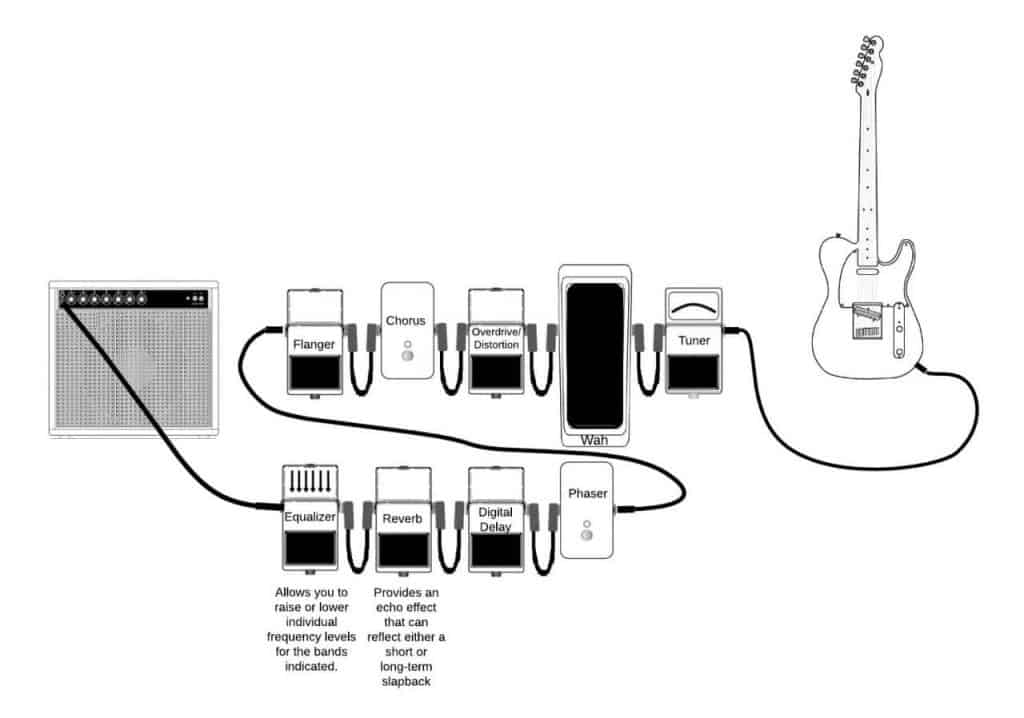
In the image below, we drop an equalizer and reverb into the above mix. There are huge differences of opinion on where to put the equalizer.
Some like to attenuate the incoming signal and place it directly after the wah pedal, but that seems more and more to be a minority opinion.
Most players seem to favor placing it after the “dirt” pedals (e.g., phaser, flanger, overdrive, etc.) and some even prefer it at the end of the chain.
It seems to make sense to place it there since the ultimate goal is to tweak the output, which is why almost all amps have some sort of parametric eq – meaning bass, treble, and midrange controls, and some even have graphic equalizers onboard.
TIPS!
I would personally place it at the very end for this reason, but theoretically you could place it anywhere to fine tune the signal at that point. For amazingly lush reverb (at the end of Slash’s signal chain) check out Guns ‘N’ Roses’ Don’t Cry.
2.4.The Headliner
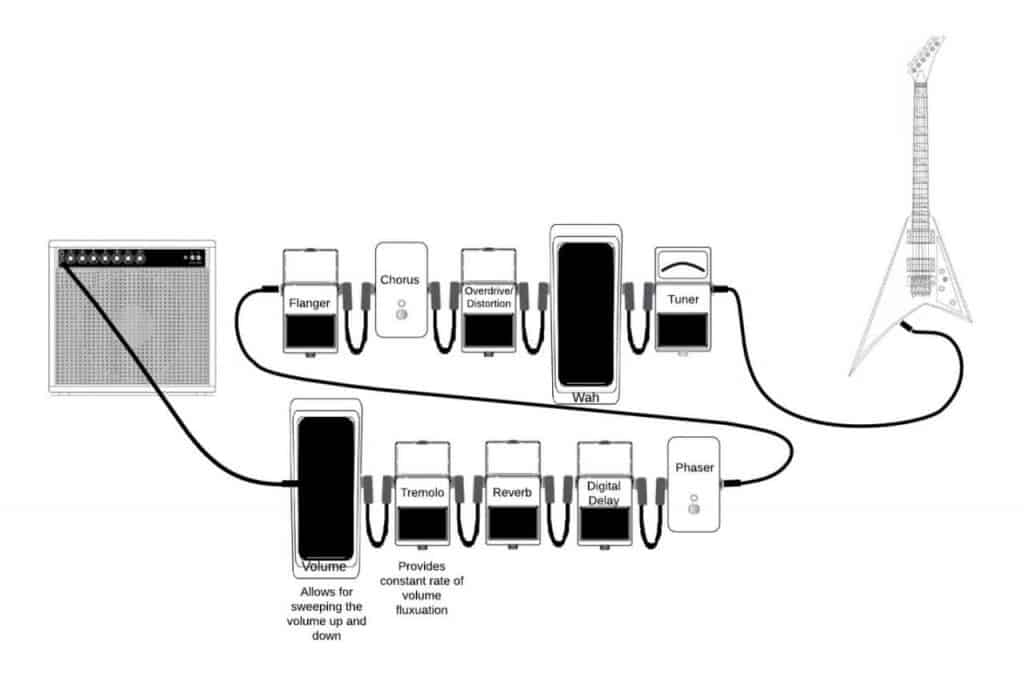
The last chain we are going to look at adds tremolo and a volume pedal to the mix.
A tremolo pedal is used to rapidly turn the volume of a signal up and down, creating a shuddering effect. This should not be confused with vibrato which changes the pitch of the signal. The two terms are often confused, so that should set the record straight. Once the rate is dialed in, it is constant whenever the pedal is turned on.
Tremolo can go almost anywhere after the chorus since it is volume effect and has no effect on the relative pitch or tonal color of the signal. Perhaps no more perfect example of effective use of tremolo is Creedence Clearwater Revival’s Born on the Bayou.
The volume pedal is also a way to control volume, but it is different in that it can be used to vary the volume in a way that a tremolo cannot. It should be looked at as a way to remotely control your amp’s volume without having to fiddle with the knob on your amp, which would be nearly impossible to do within the context of a song.
As such, it should be the absolute last effect that you should add to the chain. Slash makes extensive use of his volume pedal in the Guns ‘N’ Roses song Estranged.
3. Wrapping it up
I hope you found this tutorial enjoyable and informative and keep these pointers in mind when you are setting up your own pedal board.I also hope that this clears up any questions that you had about how the various effects work and how their positions in the signal chain affect your sound.
Ultimately, playing around with your effects and seeing how they work best for YOU is going to be the deciding factor about where they end up. If you have any comments or tips, please include them in the comments section.Keep on rockin’!